 |
|


 Mar 02, 2009, 08:57 PM // 20:57
|
#1 |
|
Frost Gate Guardian
Join Date: May 2006
Profession: N/Mo
|
 FoW N/Mo w/3 Heros (Image Heavy)
You must be able to 55 as a necro in alot of this guide.
Before I begin I'd like to say that I haven't gone into depth with Runes or Weapons.If anyone really wants to see what I have particularly done I will post to that effect.Also I have not given a tutorial on how to 55 anything.If you can't solo effectively I wouldnt try this unless you have skills with another class in FoW.I also have not posted quest completion..this is more a guide to clear.If the demand is there for Quest completion I'll go into it at a different time.This is alot to take in for the moment so let's get rockin'...and yes theres probably things iv'e forgotten to go over..just let me know. Here are the basic skills and needs for the Fissure of Woe that I use. Most of the cons are for later on..the essential one you'll need is the Scrolls of Ressurection.  The skills breakdown are shown below...you'll notice the solo FoW Necro build..I'll start with that. Basically the build revolves around you being able to do high damage output on multiple targets using SS and IP.The three main enchantments of course are Mending ,Balthazars Spirit and Essence Bond to help you gain energy upon being struck.The use of Vigorous Spirit in this build seems to confuse people sometimes so I'll desscribe it the best I can.The biggest thing you'll need is 2 sets of armor.I use one for 55 and one with high HP.You will need to swap armors frequently.If anyone has read my UW guide with Heros you'll see the 2 sets I use..if not I will post screens and descriptions of armor and weapons I use upon request.So Dunkoros build is very similar to the 3 Hero UW build I use with a few skill swaps.To be honest his job alot of the time is to Echo Spellbreak..also Remove Hex helps when fighting Shadow Beasts due to them casting SS and MoP but I feel Cure Hex would have been a better choice for this slot.Rebirth is there if you die..if you feel you wont make it through a fight as 55 or aggro something thats to much..just flag Dunkoro away and let him Rebirth you (it also saves the SoR if your Monk can just rez a fallen Warrior without having to burn through scrolls)   The Warrior builds again are similar to the UW builds, I've swapped a few skills and given both Warriors "Wards".Koss uses Wards against Elements and Jora uses Ward against Foes.I find these skills work nicely and they tend to use them at the appropriate times for the most part.For the first part of FoW I basically use them as cleanup or straightup offense and normally turn off Obsidian Flesh.While nice against certain enemies , it does slow their movement down hence the reason Rush is in there..and yes the attribute points I spread out between them are odd but have yet to fail me..if I ever die it's usually my fault. 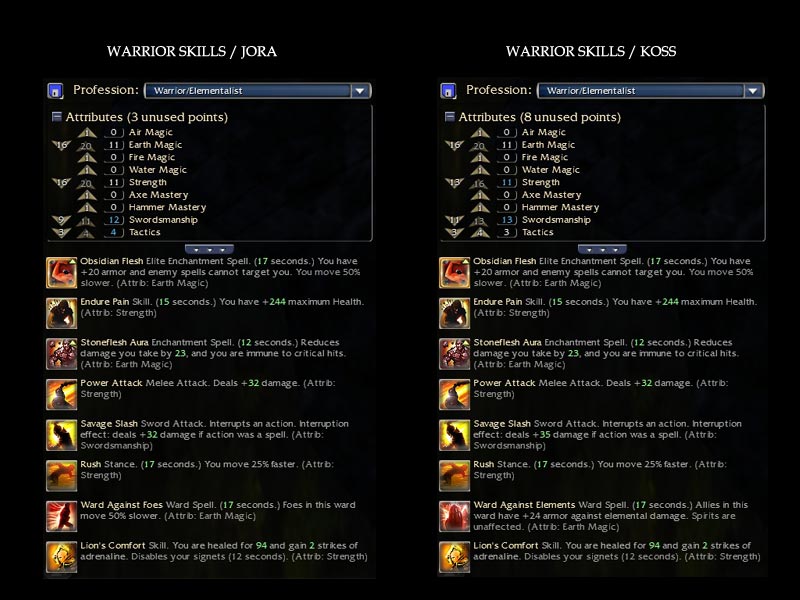 So thats the skills in a nutshell..if they confuse anyone or anyone has better suggestions please feel free to discuss this.If anyone wants to see Rune setups for Dunkoro and the Warriors I'll be happy to go into some detail about them as well as Weapons if asked. Moving on. Essentials about Fow with you and 3 Heros. 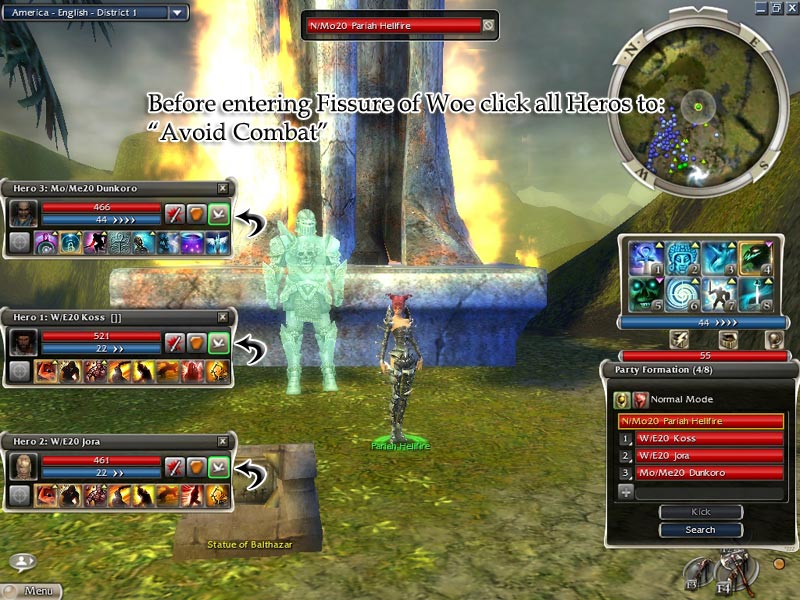 1) Always be aware of your hero(s) status (Avoid Combat , Defend and Fight) 2) Always make sure all Heros are set to Avoid before entering FoW. 3) Sometimes when first spawning in the FoW you will get smoked instantly,random enemy spawn. 4) When not in 55 mode you act as a Healer and Offensive character , heal your Heros. So here you are in the FoW,Flag your Heros behind Rasti and keep them all on Avoid.Put your 3 enchantments on yourself and target the mob to the left. 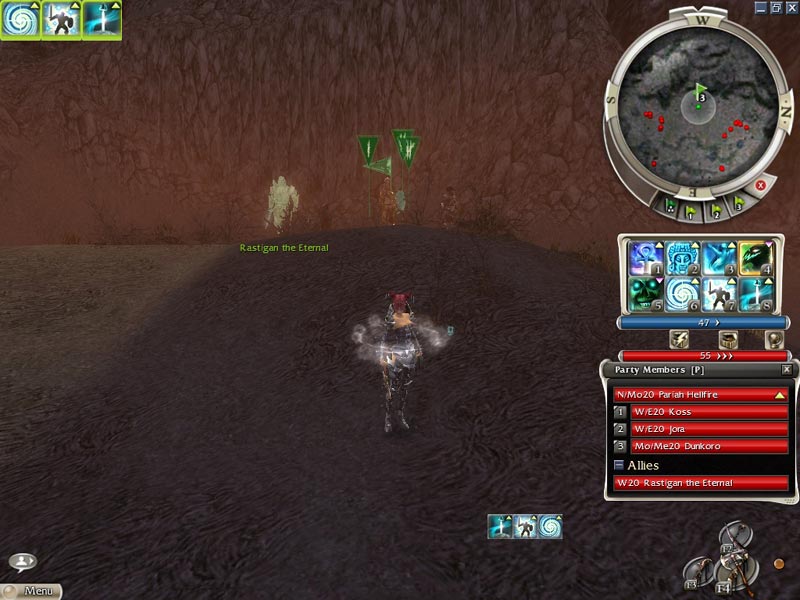 Mob 1:The stradegy for these guys is very simple..wait for the wandering Warrior and Shadow Beast to come back into the group and target a Warrior.You will want to get Insidious Parasite on a Warrior almost immediately to feed you HP.Gather the mob on yourself and head for the Monk.You don't need to attack anything at all,just let them do all the work.Go up to the Monk and cycle through the 3 Warriors , casting Spiteful Spirit on each of them repeatedly.As a side note be aware that Shadows Monks have the ability to Restore Life to fallen enemies.Reduce the mob to dust and flag your heros to kill the monk,don't forget to set everyone to fight at this point.This is also a simple way to get used to using your Heros offensively.You can see that Koss and Jora use Savage Slash very effectively against the Monks and interrupt WoH and Restore Life quite effectively.   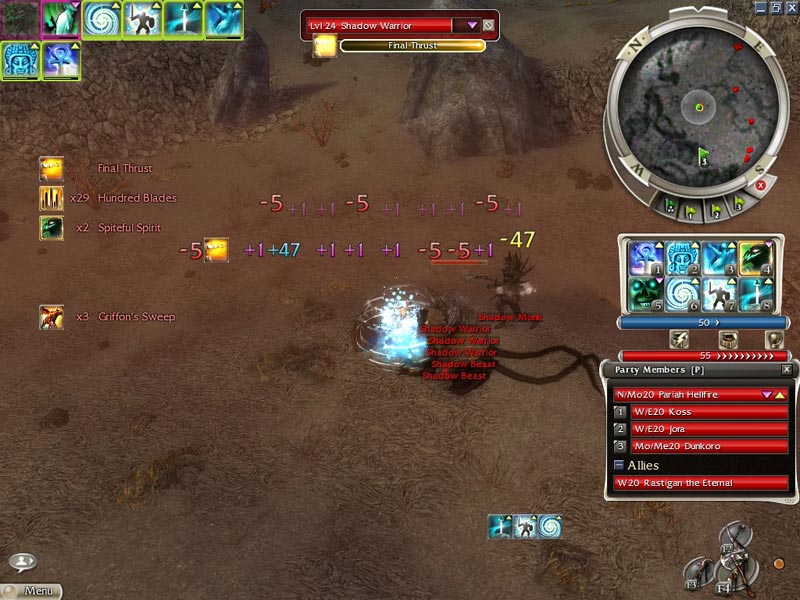 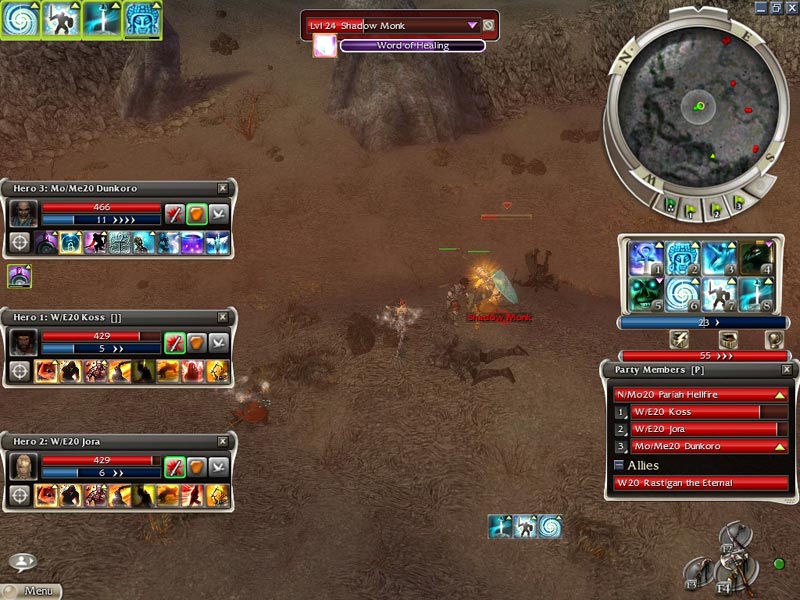 Mob 2:The dreaded 2 Eles , Warrior , Mesmer and Shadow Beast. Very simple in terms of stradegy, flag your warriors out of the way and put Dunkoro as shown below.Make sure you set him to avoid and turn off all his skills except Spellbreaker.keep him on the edge of your aggro bubble.Your main target is killing the Mesmer.The way you kill him is with the Shadow Warrior.Force Dunkoro to cast Spellbreaker on you..cast Protective Spirit on yourself and run towards the Mesmer.Target the Warrior and cast SS and IP on him.Stand beside the Mesmer.When SS recharges cast on the Mesmer.Watch the mesmer die. Note:Spellbreaker WILL run out during this battle.I do not suggest sending Dunkoro in for another cast..he will most likely pull aggro off of you and this is bad.When Spellbreaker begins to wind down..use the Vigorous Spirit method of Covering your main Defensive spells and you'll be totally fine.Cycle between the Eles when everything else is dead and SS them. 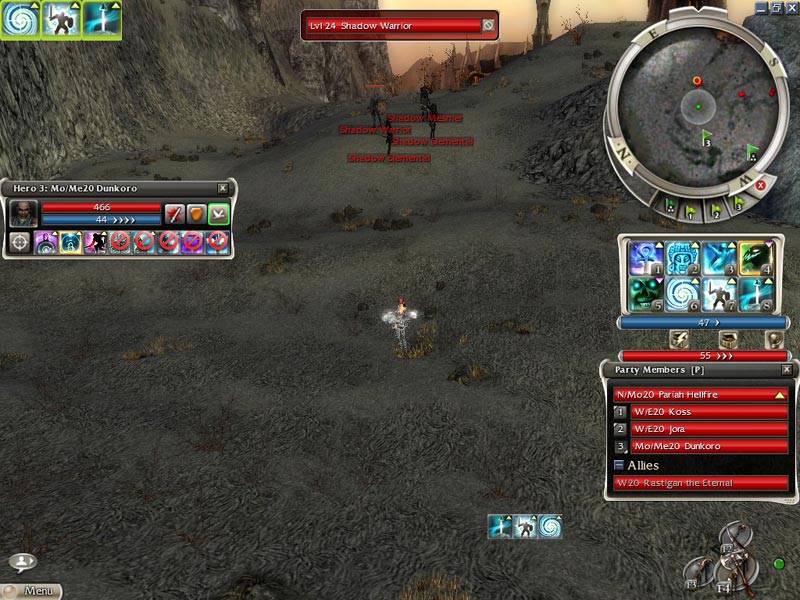 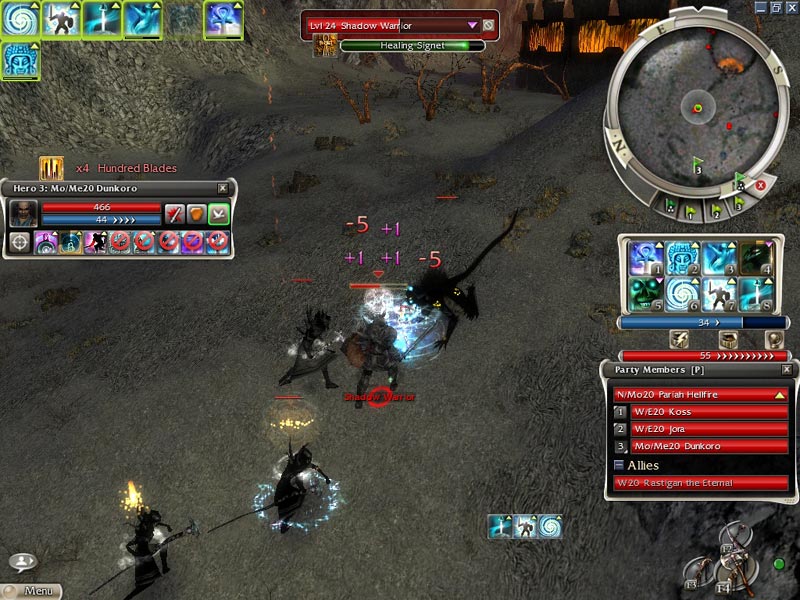 Mob 3 and 4:The Shadow Beast and Monk. You'll see the two groups patrolling beside you.One Monk and One Shadow Beast.You'll only want to take one group at a time.Take off your enchantments and swap to your high HP armor,also swap to a regular weapon set,whatever you have will do.Set all your Warrior Heros to attack and Dunkoro to Defend.Flag them to where Ive shown in the SS and pull the one group towards you.Allow the Shadow Beast to lock onto you,it doesn't matter,it can't kill you.It may lock onto Dunks as well.Target the Monk with the warriors and cast SS and IP repeatedly on him.Come back and kill the Shadow Beast.Repeat and rinse for the other patrolling mob.You did remember to turn Dunkoros skills back on right?As a side note..be aware that if you have SS or MoP cast on you..don't physically attack anything,stick to casting.Kill Them and reset to a 55. 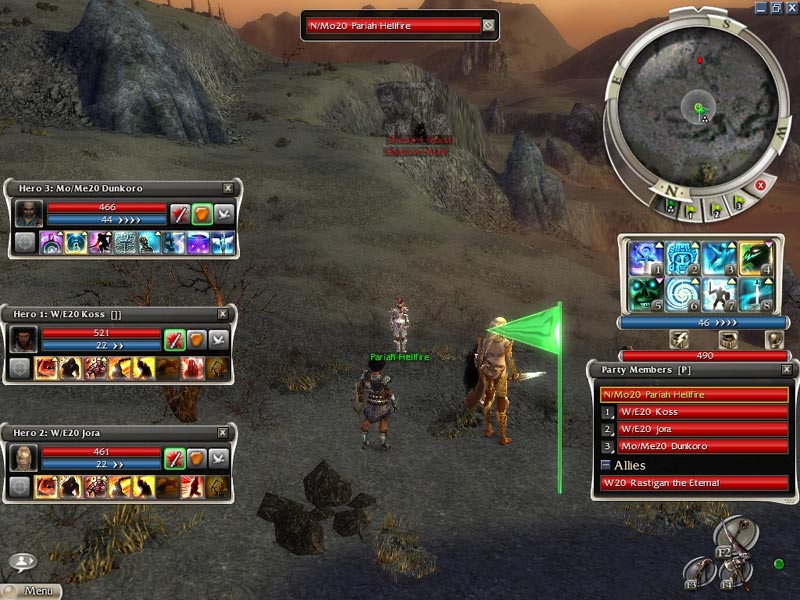  Mob 5: The Warrior,Beast,2eles and Mesmer. (Reset to 55 Necro) The stradegy is the same as the first Mesmer mob you just killed.Flag your Warriors out of the aggro to somewhere you feel comfortable.Keep Dunkoro just out of your aggro bubble.This might be a good time to Echo that Spellbreak.Make sure you get IP on the Warrior and if you are hesitant to run to close just cast on the Mesmer from a distance.When Spellbreaker runs out you have two options,if you are in a decent position and holding the aggro you cast force Dunkoro to cast the Echo'd Spellbreaker on you..if not use the Vigorous Spirit Method of covering yourself.When they are dead wait for the 2 Eles to come back down and lure them away from the Monks and SS them. Note:You'll notice a couple things with this mob..A)There are 2 extra patrolling Eles that enter the picture..leave them,wait until they go back up top and then fight.B)You'll also notice a group up top with Monks..if you don't pull out of their range they will attempt to heal the mob you are fighting.I apologize I didnt load the screens for this fight but will update tonight. 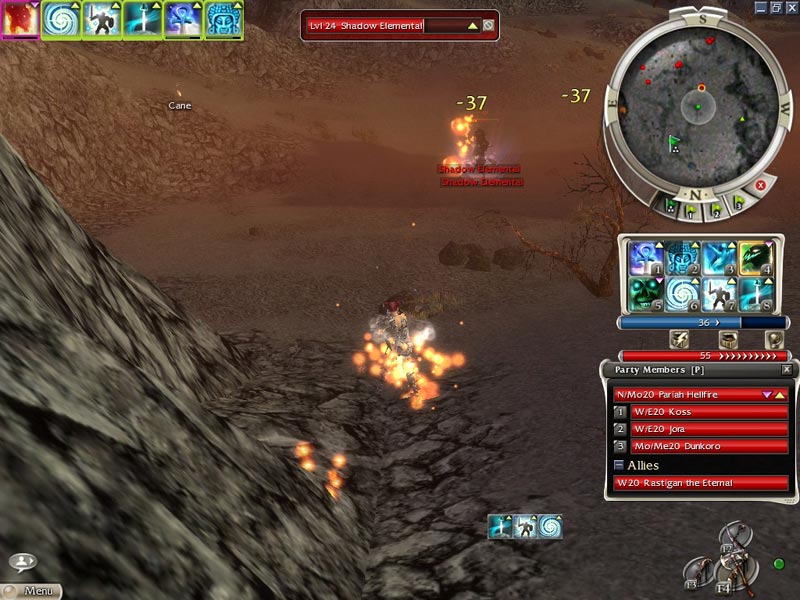 Mob 6:The Monk and 2 Warriors. Off to the right is one Monk and Two Warriors..Flag your Heros to Rastigan or somewhere near him.You'll want to pull them monk down from his perch and use the Warriors against him with SS.When the Warriors fall bring in your Heros to finish off the Monk.Making sure you have set them all to Fight. 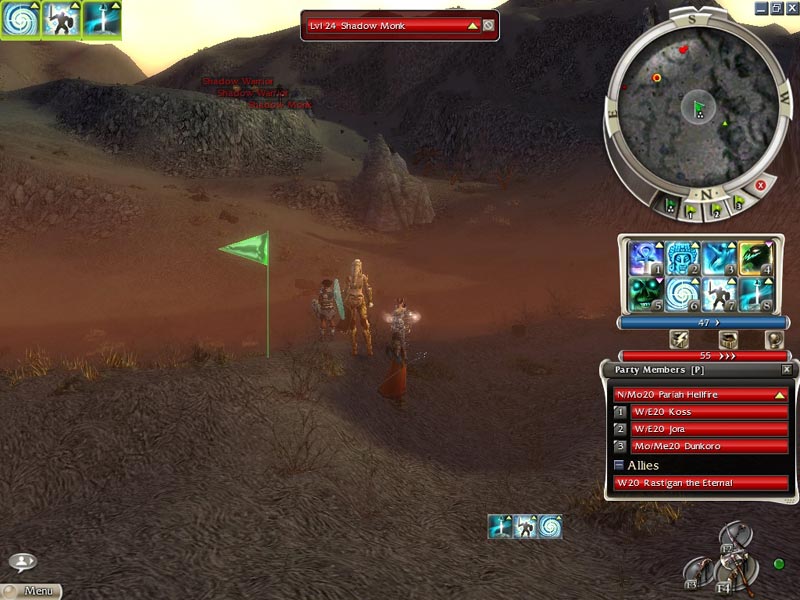 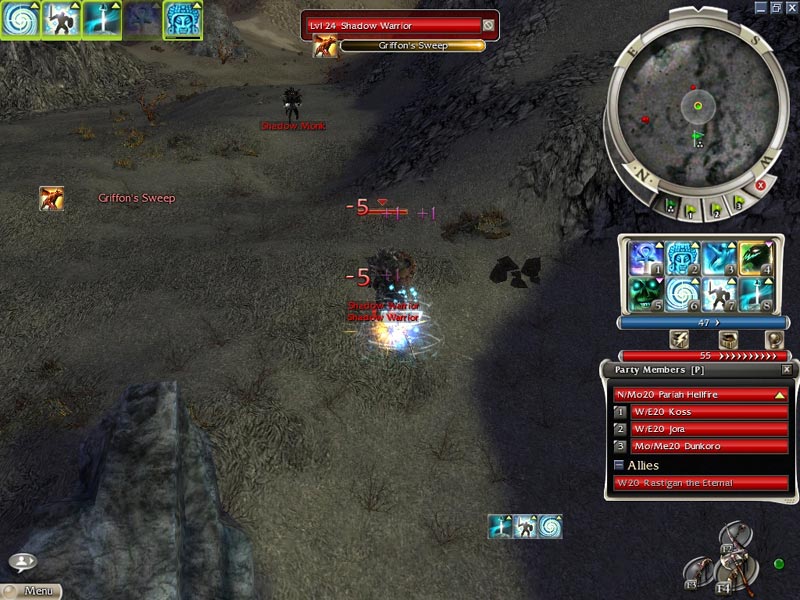 Mob 7:We will be heading for the Beach from this side.When you walk up to where the Monk just was..or thereabouts..you will spawn a couple groups.The Mesmer and 2 Eles break off and start their patrol around.Target the Monk and Warrior Mob first,you will most likely pop a Shadow Beast at this point.It's the exact same stradegy as the last mob.When everything is dead bring your heros up to finish the Monk. Mob 8:The Mesmer and 2 Eles. Easy peasy right..flag your warriors out of harms way...keep Dunkoro just out of your bubble..target the Mesmer..you can attempt an Echo'd Spellbreak but it probably isn't necessary.Cast SS and IP onto the Mesmer.Kill him off..ball the Eles up a little and SS them using a cycle between them.  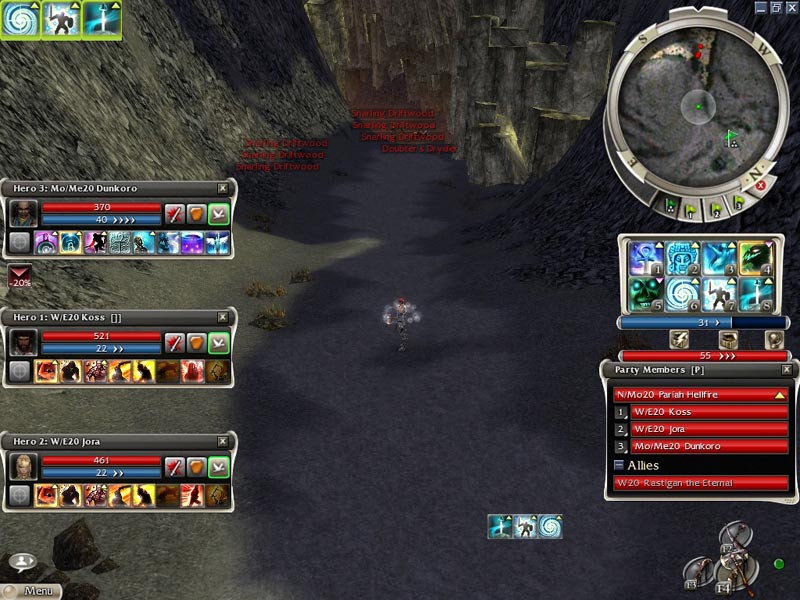 Going back through the other side you can clear a path towards the Plains/Forest. Fighting Abyssals and Rangers is all about timing..just remember not to kill all the groups always leave one left at the end or Rastigan will start taking off and you dont want that. So basically pick single groups of three at a time..always target the Abyssal and use IP constantly..the trick with the Abyssal knockdown is to begin your cast the moment you start standing up from the knockdown.After that just ball the rangers up and SS them.Work down the back side easily. 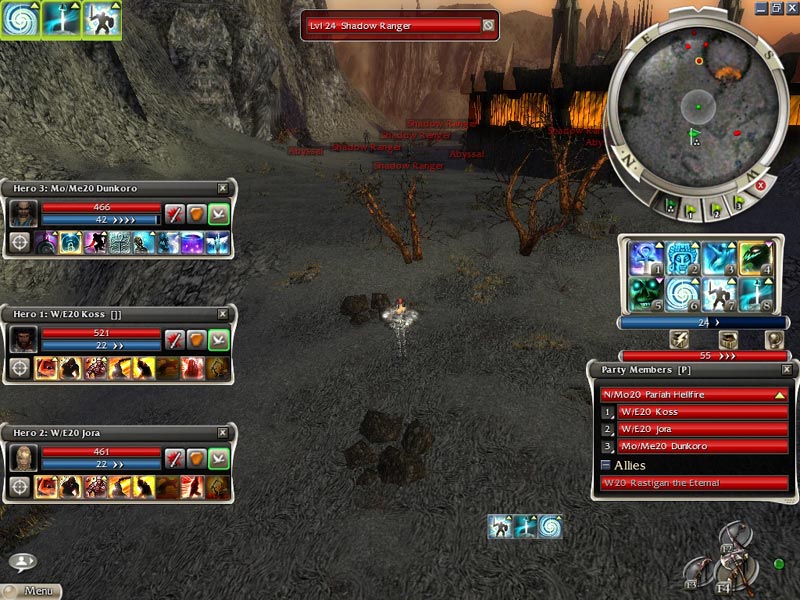 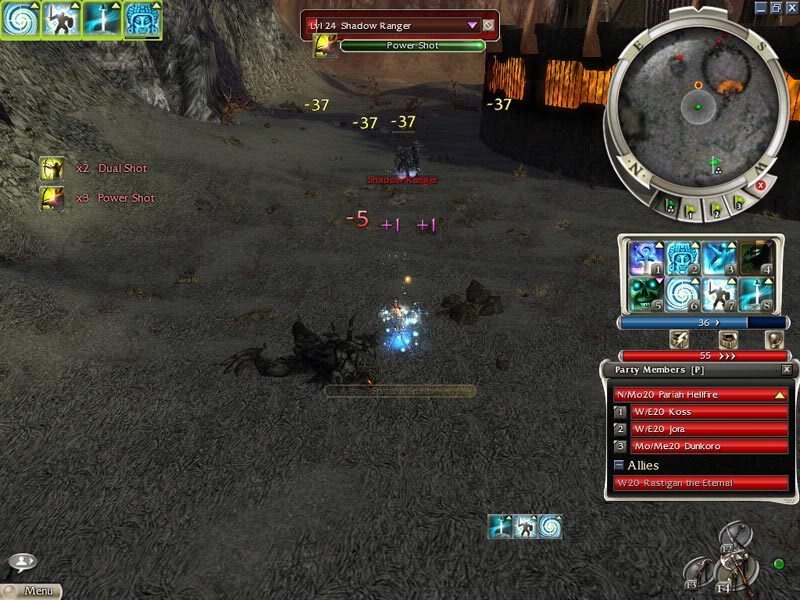 So lets go to the Beach First.. Beach Mob 1:Snarling Driftwood: The entrance to the beach has it's dangers,but this mob isn't one of them.Just make sure you are set as 55 , gather them into a ball and cycle SS on them.Nothing to worry about from these guys. 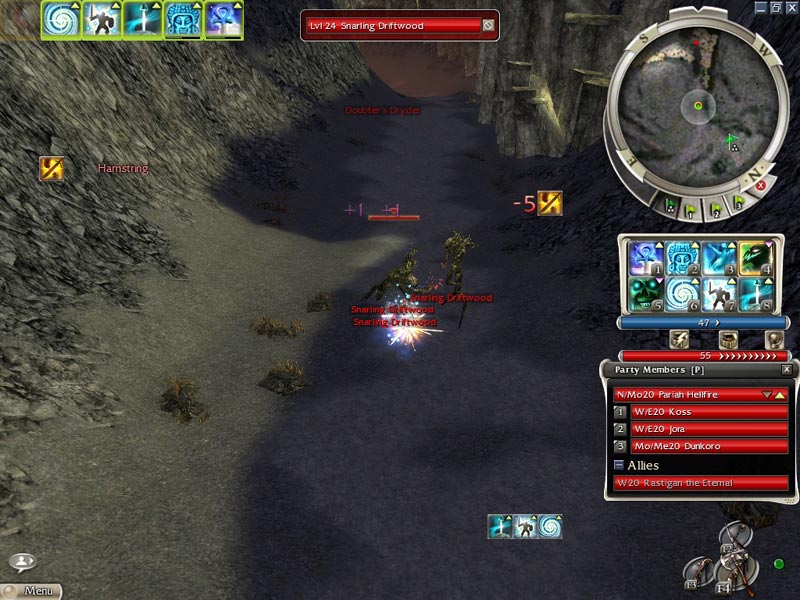 Beach Mob 2  oubters Dryder: oubters Dryder:Best method from here is to drop your enchantments,swap to the higher hp armor set and weapon set.Lure the Dryder out a little and send the crew in for the cleanup.The Dryder will go down quite easily.  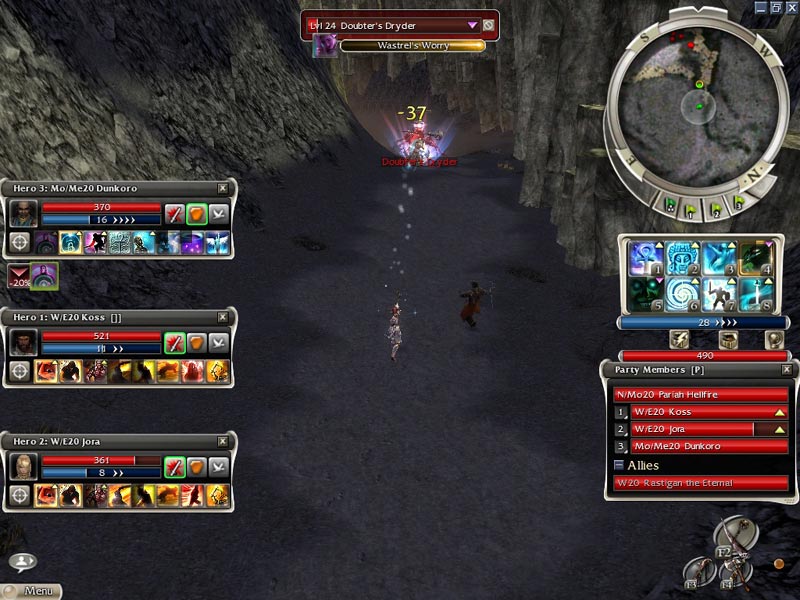 Beach Mob 3:More Snarling Driftwoods: There will be a patrolling mob of Driftwoods that come by right at the bottom of the ramp to enter the Beach..make sure you wait for them and pull them out before proceeding through..swap to your 55 setup and take them out. 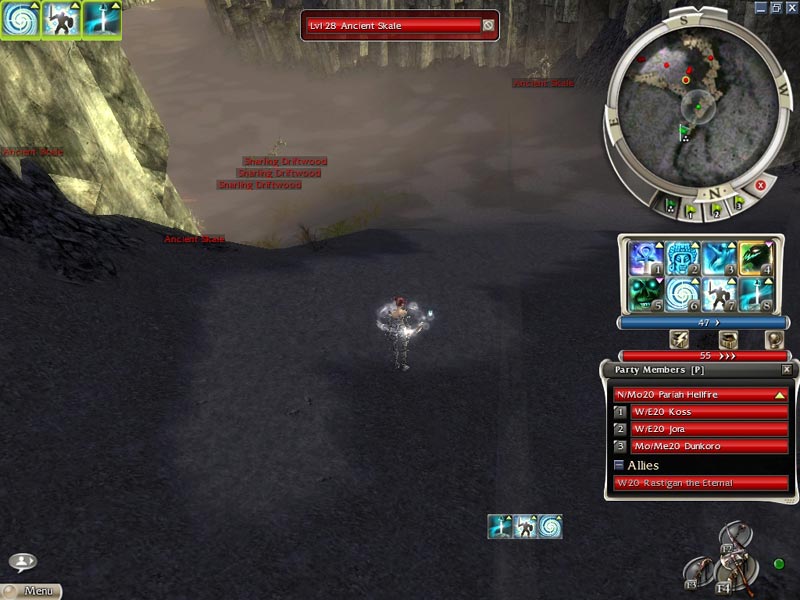  Beach Mob 4:Ancient Skales: The most effective way to ensure your heros and you survive is for you to pull the Skales.After you get them moving towards you , then send in the warriors.They will hold them just fine and make pretty short work of them.Make sure you are NOT 55 in this case..high hp and no -50 cesta helps.Make sure you are getting SS and IP off and also heal your fighters..amazingly Vigorous Spirit works wonders as well as Healing Breeze.They will use Grenths Balance and that can hurt..your warriors should be able to effectively take care of that spell in most cases. 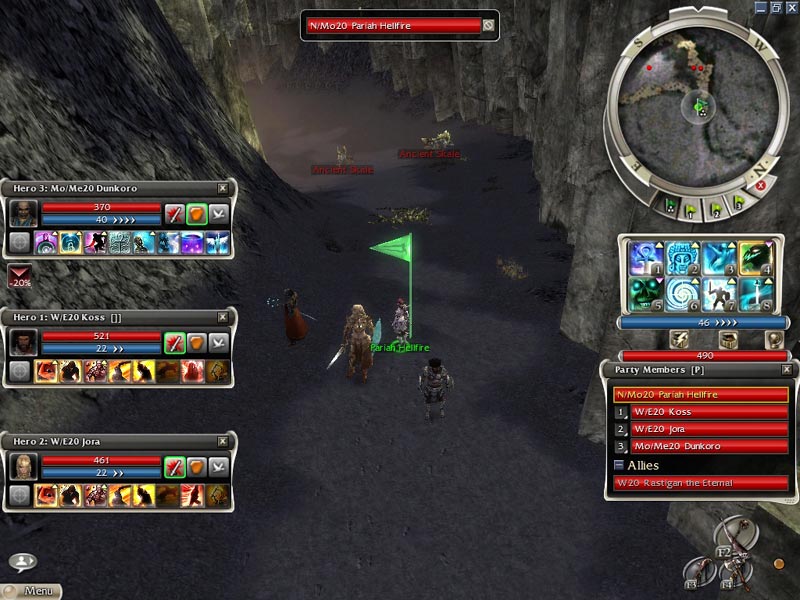 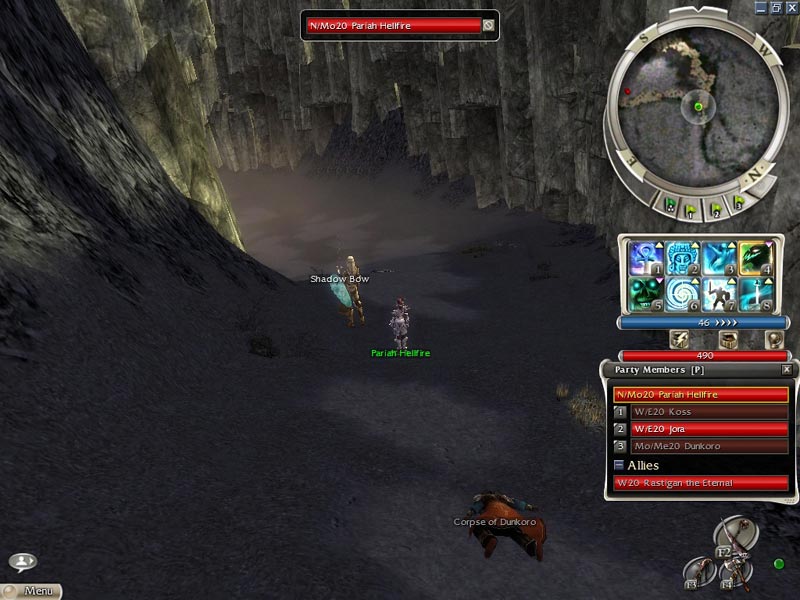 Without getting into every single mob on the Beach here..I'll just go as far as to say if you keep your aggro to 3 at a time it's a walk in the park (or on the beach)..keep picking your way through until you come to the cave entrance. 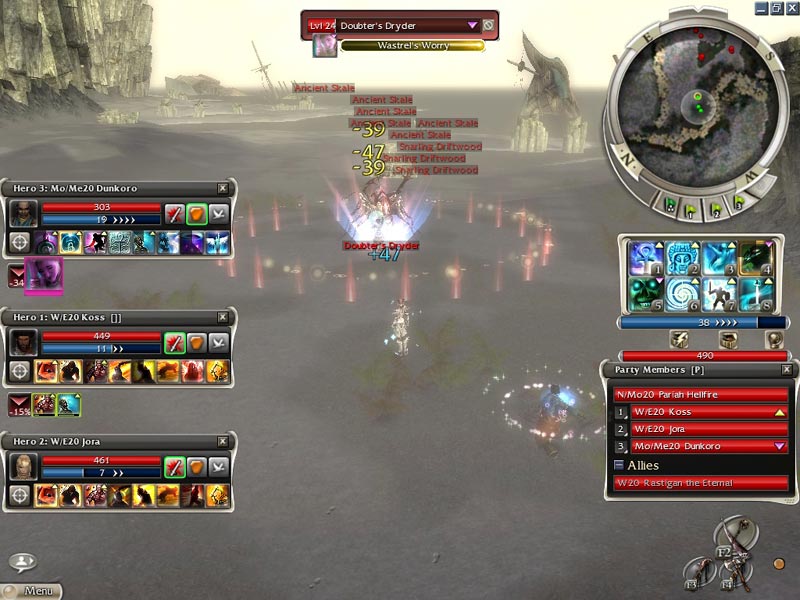   Beach Mob cave entrance: You'll notice Doubters Dryders standing around a cascading water covered entrance to a cave.You can pick these guys off very easily using the technique I previously went through.The problem with this area is that you will have a Hellstorm of Armored Cave Spiders that gang up on you.Not unlike the Obsidian Behemoths in the UW they use Healing Spring which is a total annoyance..yet ball them up and wallblock the mass and begin cycling SS through the group.Best way to do this is to select the nearest Spider , cast SS on it..then hit "tab" and select the next closest Spider and SS it..just cycle SS between these 2.This can be a long fight but you will win in the end.   So the rest of the Beach is picking through the mobs again,exactly as I outlined earlier.  Entering the actual cave pops a host of Spider and Dryders.The absolute best way to go through it is to pop and pull one mob at a time and you'll figure a pattern out. Lets Do the Plains/Forest next.. Entering the Plains.(Head left for Forest) This isn't as difficult as it may seem.There are definitely alot of Ether Breakers around and that is your only real worry for the time being.So let's get started. Plains Mob One: 3 Icehands and 2 Breakers: With these guys you'll want to have Dunkoro Spellbreak you and concentrate solely on the 2 Breakers..Cast SS and IP on One Breaker..Cycle to the next one a recast on him..leave the Icehands.When Spellbreaker runs out,use the Vigorous Spirit Method to finish off the second Breaker.After that just ball up the Icehands and SS them..you can also set in the Warriors to finish off the Icehands.  Plains Mob Two:Pop up Skeletal Rangers: Right after you kill the first mob you'll run into 2 rangers that are buried along the right side wall..just pop them out and immediately cast SS on one.This is a matter of timing IP on each one after that..they have Distracting Shot and are pretty decent at using it..just cycle and they will drop. Plains Mob 3:Random Patrols I say Random patrols becasue they never spawn the same mob it seems..sometimes it could be Icehands or sometimes it could be Ether Breakers.I won't Screen all the mobs here..just suffice it to say they are the same technique throughout the plains generally for each mob. Breakdown of random patrolling mob: You will encounter one of the following: three Beserkers,two Bonds and one Icehand three Beserkers,two Bonds and one Breaker The Icehand mobs are simple the only thing you need to worry about is Maelstrom.Just use the Beserkers as damage dealers with SS,run up beside the Icehand and cast IP and SS on him.When they all fall you'll have the two Bonds left.Just pull these guys into a tighter ball and cycle SS between them...this is also a good time for Heros to take them down. The Breaker group requires a Spellbreak from Dunkoro and is generally the same fight as the Icehand..if Spellbreaker dissolves then use the Vig Spirit method and finish it off..Heros can help here when the Beserkers are dead to. OK so you've succesfully pulled and killed the mobs up to the center..you'll notice a single mob of 2 Breakers and 3 Icehands..this is the exact same deal as the very first group you took care of entering the plains..target one Breaker and force dunkoro to Spellbreak you..SS and IP one Breaker..then the same for the other..easy. Heading Left off the Plains you'll be entering the forest. The first mob you'll run into are 3 Spirit Shepards.You'll want to fight as a 55. Mob 1 Forest: The Spirit Shepards: Not a very hard mob to solo,these guys are elemental in attacking,mainly lightning surge etc.Just make sure to flag the heros back a little and pull the Shepards out a little.Ball them up and cycle Spiteful Spirit between the three. 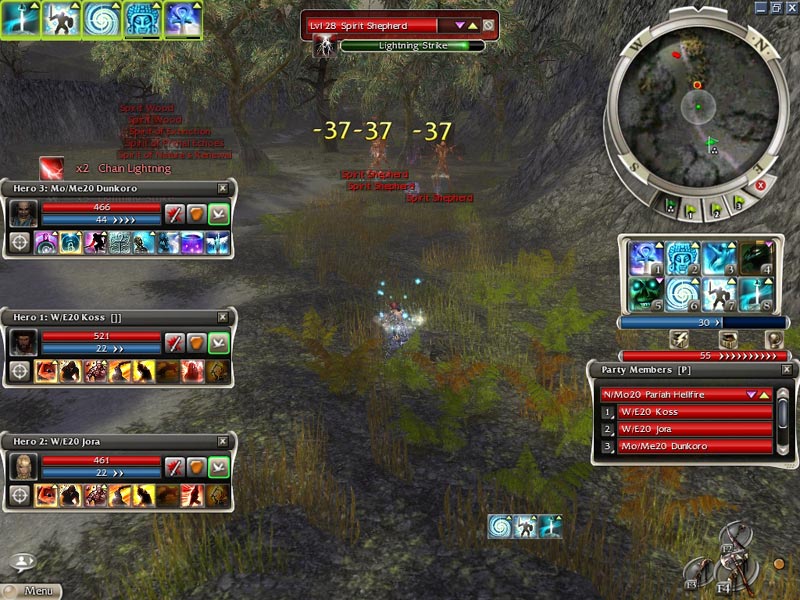 Mob 2/3: The Rock Borers: I hesistate to say you can't solo these things..if you get a decent spawn you can wall block or get lucky with a cast but it's much more effective to swap to a higher hp armor set and let Koss and Jora decimate these annoyances.The should have no problem killing these things.There are six in total , 3 on the right and 3 on the left. 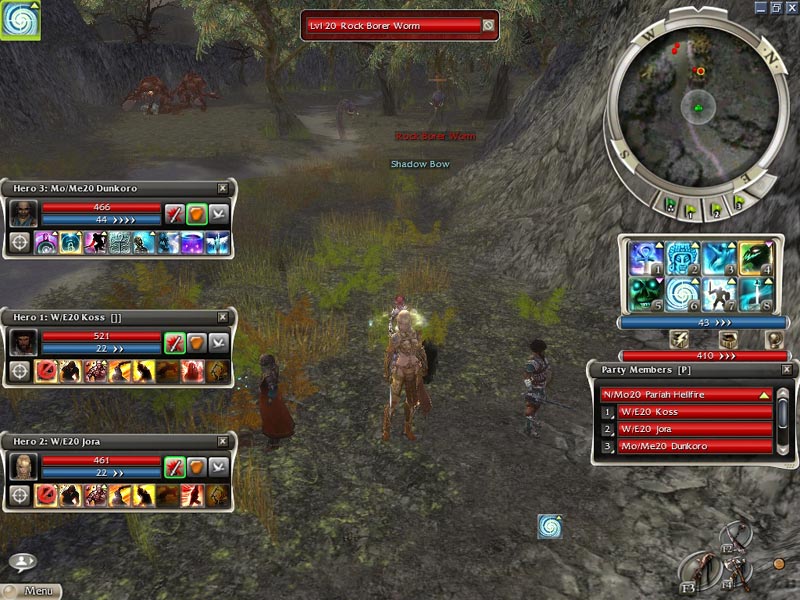 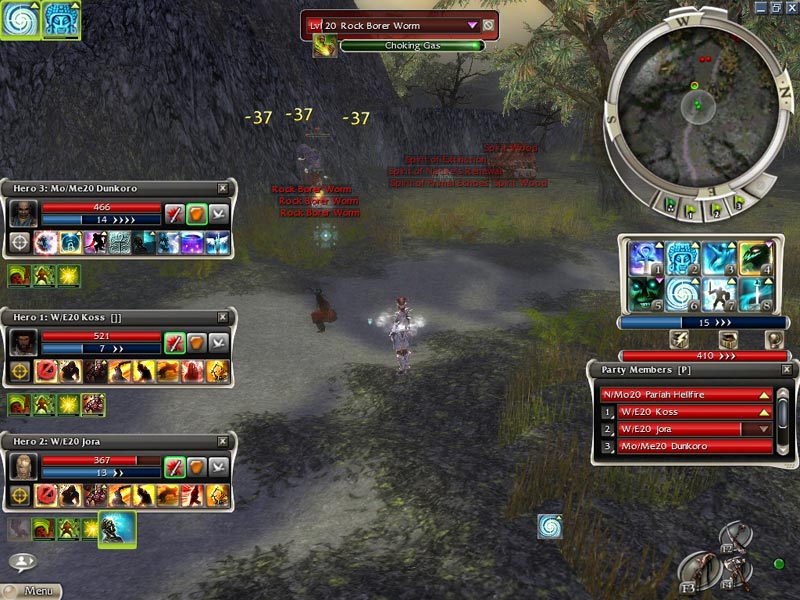 Mob 4:The Spirit Wood: Due to the Spirits cast by the Spirit Woods , it makes it very difficult to solo these guys as well.So again with your high hp armor just send Koss and Jora in for the kill while backing them with SS and IP.They fall pretty easily.  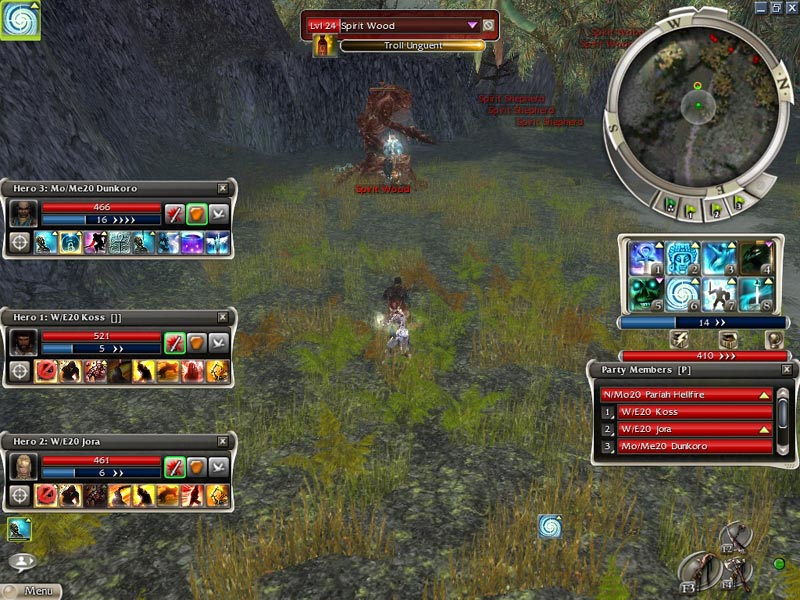 Mob 5 :Spirit Shepard and Spirit Wood I basically just decided to solo this entire mob just to show it can be done...it's perfectly fine to lure the Spirit Shepards out of aggro range of the Spirit Wood to avoid it but not always necessary..if that's the case then just send in the Warriors to do cleanup after the Shepards are toast.The Shepards will feed you enough energy with their attacks to nulify any Spirits the Spirit Wood lays down. 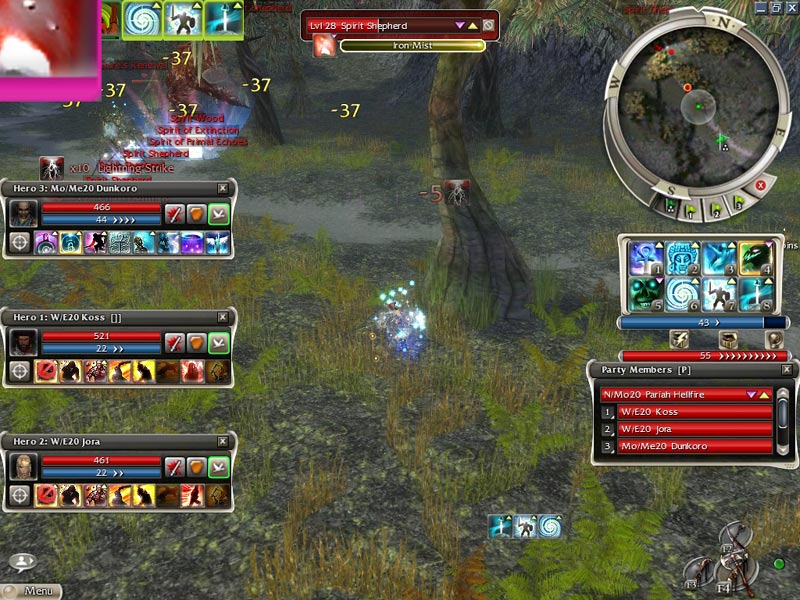 Mob 6:Armored Cave Spiders: These guys can be a bit of a pain as a 55,due to the fact they use Apply Poison and Distracting Shot I think it is..anyways the best way to do these guys is to pull one out at a time and send the meat crew in to take care of them.After all three are dead you should have noticed at this point that there is a patrolling mob of Spirit Shepards that walks through. 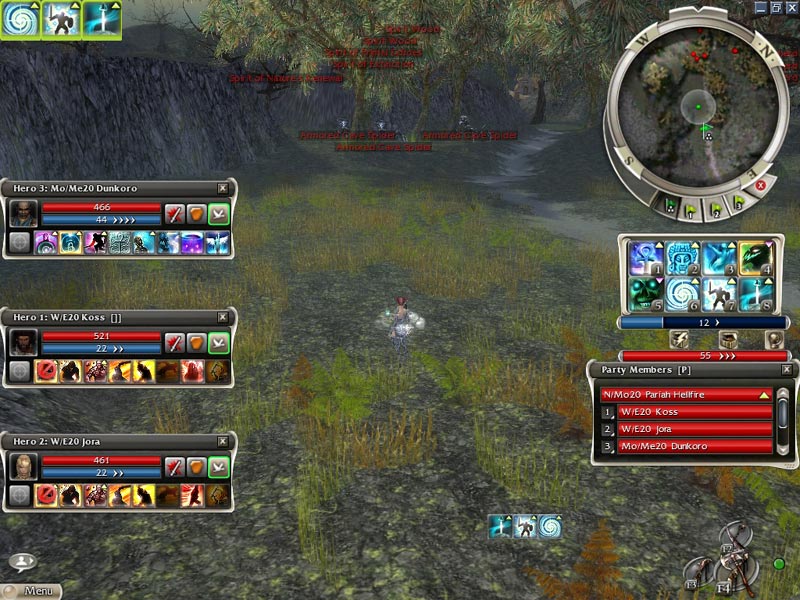  Mob 7:Patrolling Spirit Shepards: And all you'll want to do with this is to swap back to 55 and lure them out a little,then begin cycling through them with SS. Mob 8:The Spirit Woods up high: So straight ahead you can see a couple Spirit Woods walking around on top of a rise right in front of you..you can drop your enchantments and walk straight underneath them to block any physical attacks and begin SS'ing them from below..wait until the Spirits that are down to die and then reapply your enchantments to yourself.  Mob 9:The bigger mob of Spirit Shepards: Off to the left you'll see 6 more Spirit Shepards,just make sure you've reapplyed your enchanments and go ahead and ball them up nice and tight and cycle SS through the group. 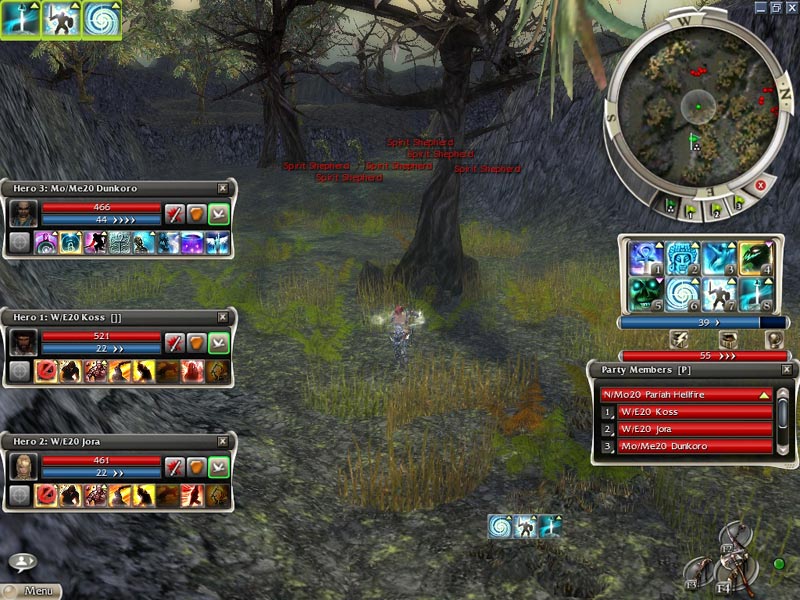 Mob 10:Pop up Rock Borers: Before hitting the "housed" area of the forest you'll come across some Rock Borers buried at the corner.Just have your heros go in and take them out. 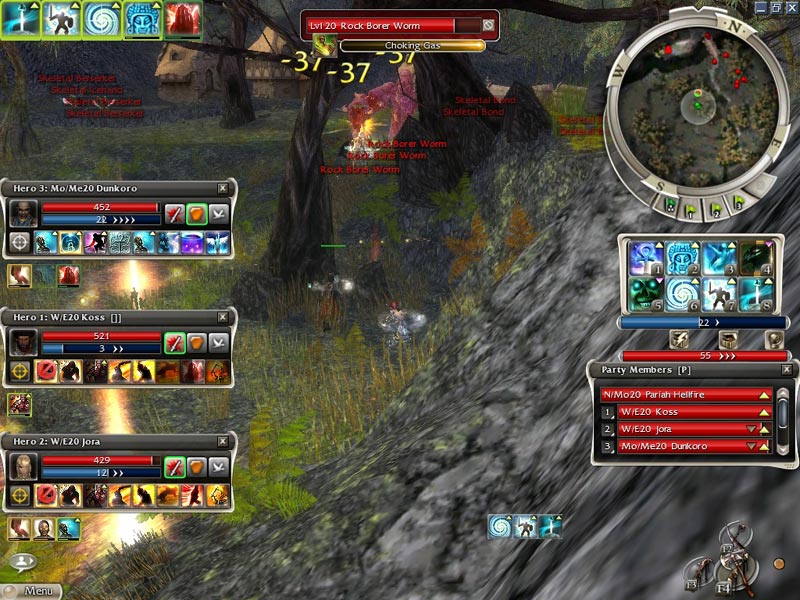 Side Note at this point...all along the right side of this area is raised with enemies above you.You can generally just walk up to the edge of the rise and take it all out from below using wallblocking..just be mindful of your energy and it'll go smoothly.The reason I go back to this is that right at the end of the "raised" side..there a couple Spirit Woods..you'll want these guys dead in particular before taking on the last mobs near the houses because of the Spirits that are laid down..they should be definitely killed off. Mob 11:First 2 Skeletal Beserkers and a Skeletal Ranger: When you aggro the first 2 Beserkers standing to the left of the bridge you will pop a Skeletal Ranger as well.Just gather the Beserkers and SS them..SS and IP the Ranger when you are able to safely do so. 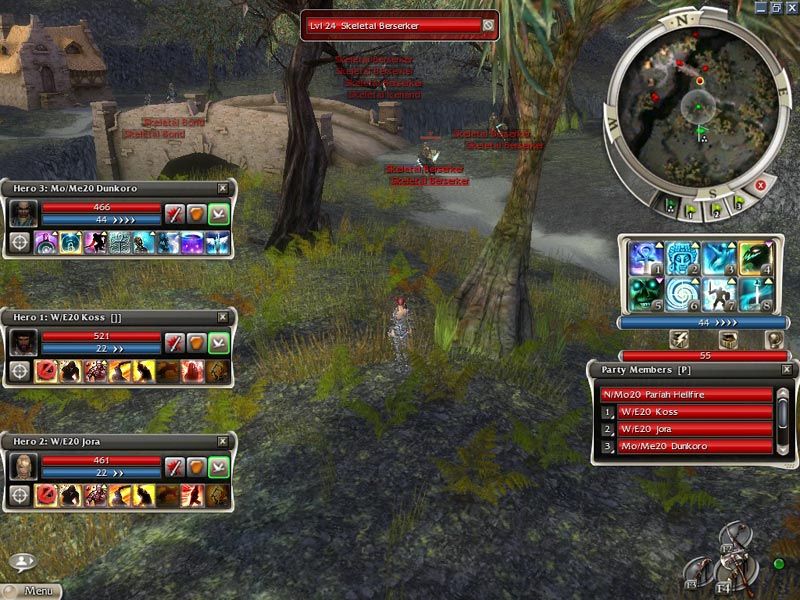 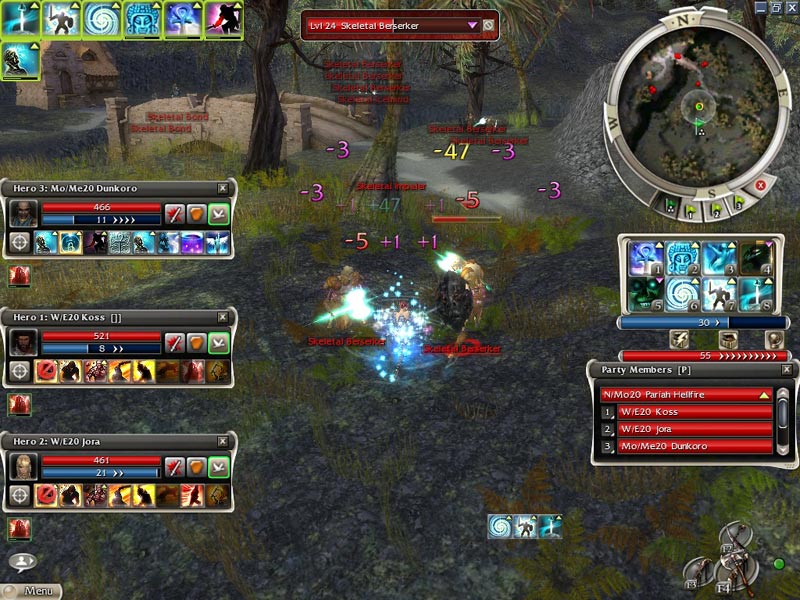 Mob 12:Second Beserkers and Skeletal Ranger: Same deal as the first. Mob 13:Skeletal Bonds: These guys aren't very difficult either.Just keep in mind that they will use Spellbreaker and if you don't time SS right you'll get punked.If you find they are difficult (which they really shouldn't be) just pull them out far enough and send the warriors in for the kill.They are 100% soloable though. 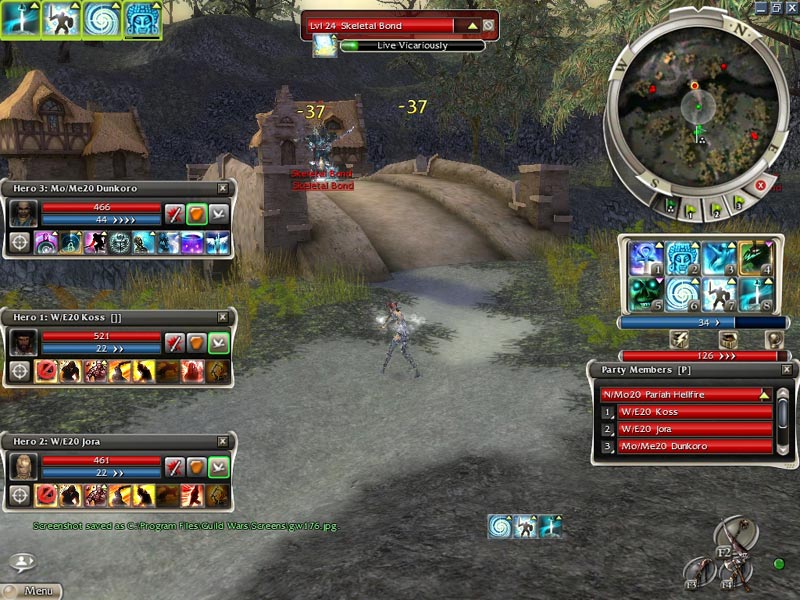 Mob 14:Shadow Beasts: Two will pop on the other side of the bridge,55 them Cycle SS. 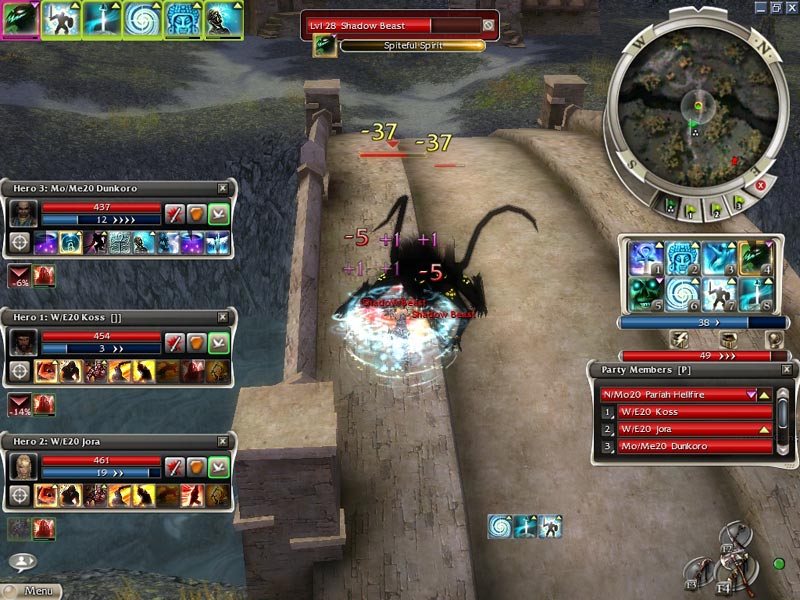 Mob15 and 16:Icehands and Beserkers: These guys are perched on both sideds of the bridge,4 on the left and 4 on the right.Just pick and choose what group you want.Use the Beserkers as damage dealers against the Icehand by standing right beside him.Keep an eye out for Maelstrom and nuke em.Same deal with the other side. 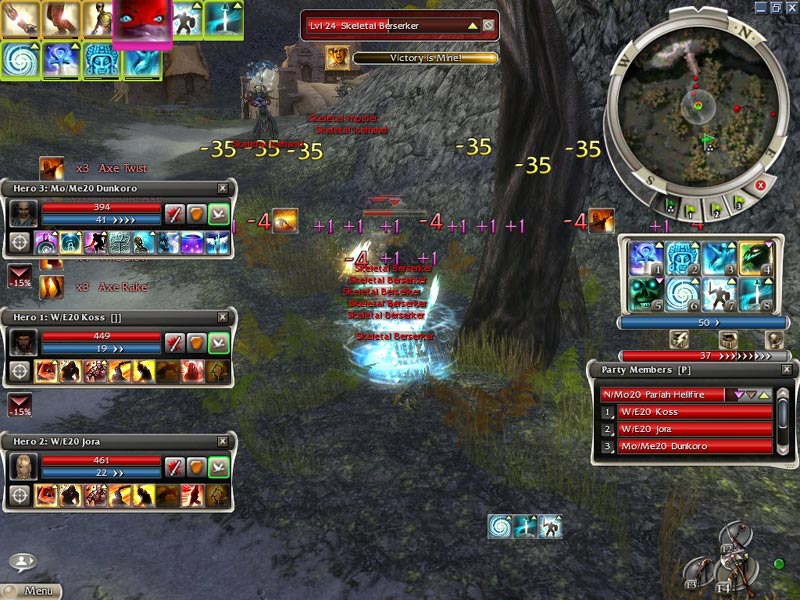 Rest of Forest:So basically the only part thats left is to clear to the side entrance to the Plains..if you really want to do this go ahead.Just be mindful that when you go through the right side you will encounter Armored Cave Spiders there that pop out.Your best bet on this side is to watch patrol patterns and apply the techniques I've shown earlier in this section and everything should go fine. Rest of Plains... Now if you look off to the right you'll see a mob of Abyssals and Warrior..leave them for now.Looking Straight ahead you'll see a Monk and 3 Rangers sitting on a little hill.Before gunning for them you have 2 mobs to kill.  Plains Mob 4:Popup Skeletal Rangers: Just like the two popups you've already killed youve got to pull these guys out and drag them away a little..they are located right underneath the Monk group so eek your way towards them until they pop.  Plains Mob 5:Patrol: There will be a patrol that comes fairly close to the monk mob and you should take that one out first.Same stradegy as pre mentioned.   Plains Mob 6:Shadow Beast,Monk,3 Rangers So you'll want to run past the mob and go to where I'm standing in the SS..you will pop a Shadow Beast at this point but just leave him to beat on you for energy.pull the monk a little closer to the center Ranger and Cycle SS between the Monk and the center Ranger.After the mob is down send in the Heros to finish off the Monk. 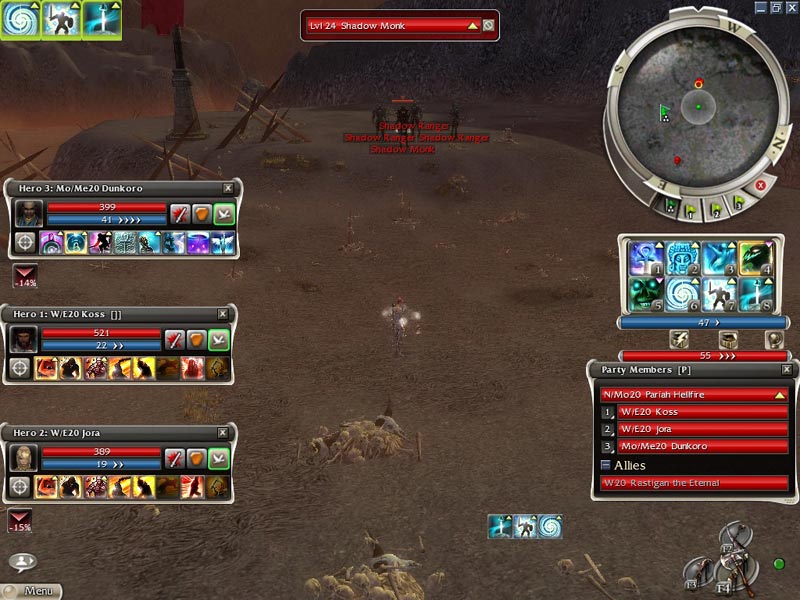 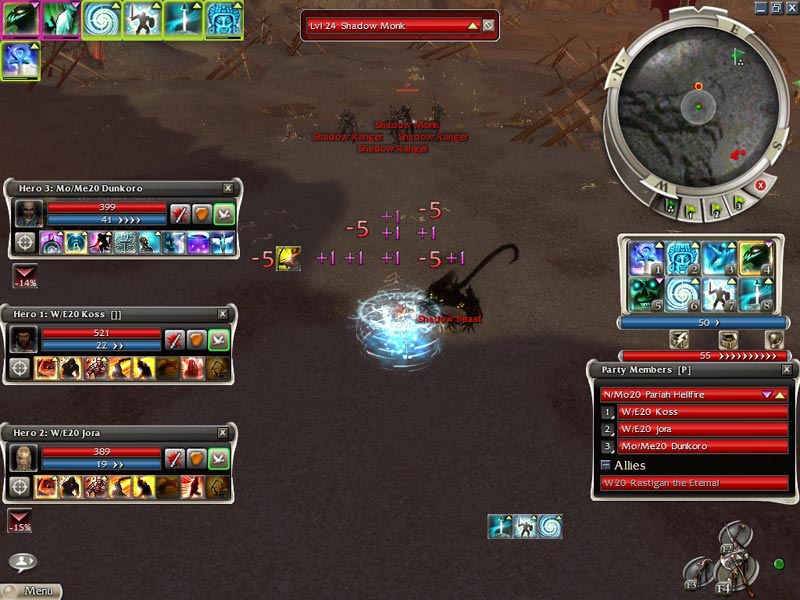 Plains Mob 7:Pop ups again: Again right beside the tents there in that little gulley are 2 Skeletal Rangers buried.Pop and Kill.  For the most part at this point just begin clearing whatever mobs are left and head back towards the large Abyssal mob earlier. There is a stradegy for these guys that works quite effectively..there are a couple groups that wander around that you can pull and run into them..this will reduce the mob to nothing..after they die though you get a mob of Shadow beasts spawn right in the center..gather them and kill them on your own. 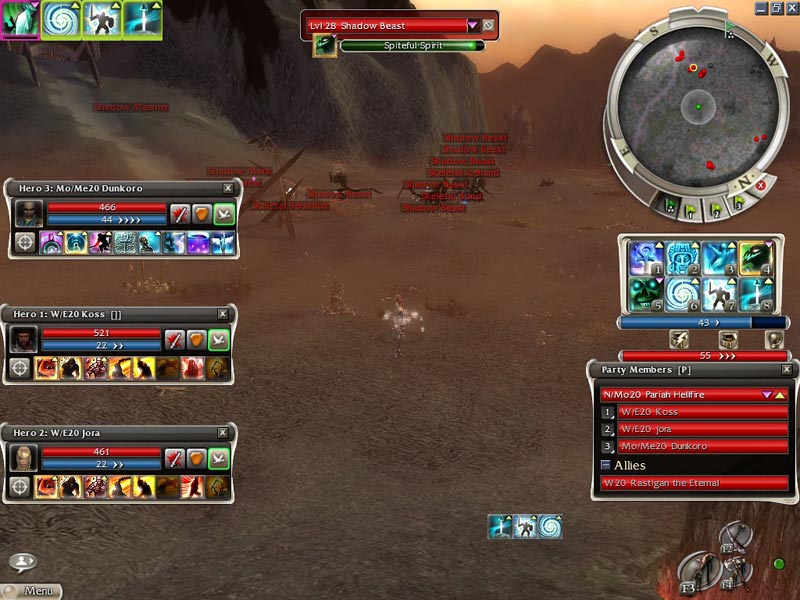 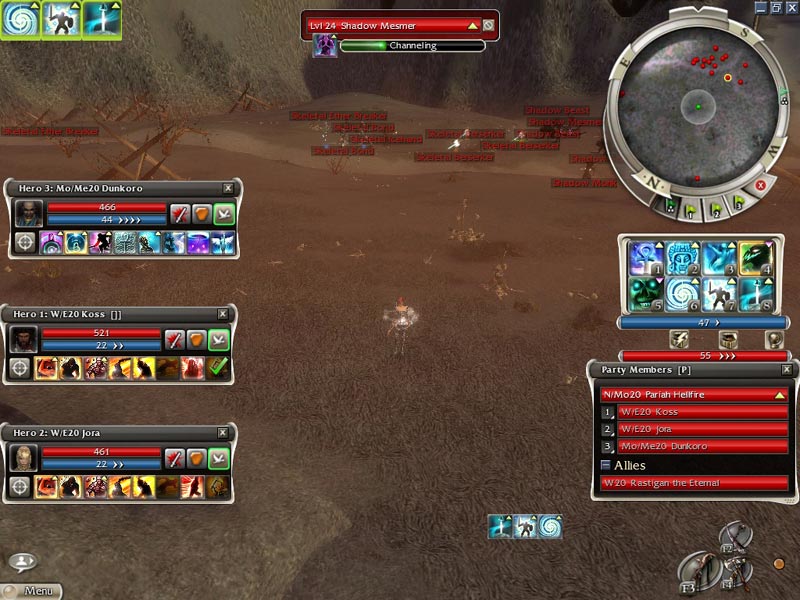 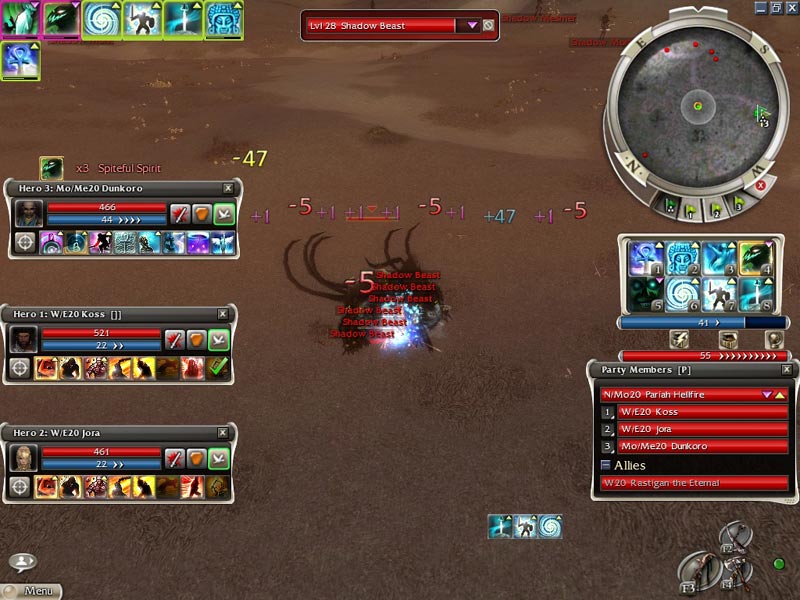 Well I hope you all have fun with this. |

|

|
|
Mar 02, 2009, 09:10 PM // 21:10
|
#2 |
|
Banned
Join Date: Jan 2009
Profession: R/
|
Very very nice
I just finished plains a few minutes took me about 8-12 minutes and now I'm on my way to the forest, I'll tell you how it goes when I finish or die >.< Last edited by Rotten Banana Peel; Mar 02, 2009 at 09:54 PM // 21:54.. |
|
|
|
|
Mar 02, 2009, 09:30 PM // 21:30
|
#3 |
|
Wilds Pathfinder
Join Date: Feb 2007
Location: Disconnect the fascination
Guild: LF High End PvE Guild that's not filled with elitists.
Profession: R/
|
How long does it take for this run to be completed?
No offense but it doesn't seem that it'd be that fast BUT it does seem like a balls of steel thing to do just to prove you can, which is always bad arse. |
|
|
|
|
Mar 02, 2009, 09:46 PM // 21:46
|
#4 |
|
Frost Gate Guardian
Join Date: May 2006
Profession: N/Mo
|
Joe: I can basically get through to the plains in just over 10 minutes..forest in and through by25 minute mark..beach is pretty fast other than the mass of armored cave spiders.The more you do it the faster you get..just depends on what you want to kill before moving onto another area.
|
|
|
|
|
Mar 02, 2009, 10:12 PM // 22:12
|
#5 |
|
Wilds Pathfinder
Join Date: Feb 2007
Location: Disconnect the fascination
Guild: LF High End PvE Guild that's not filled with elitists.
Profession: R/
|
cool. that seems pretty reasonable.
|
|
|
|
|
Mar 02, 2009, 10:29 PM // 22:29
|
#6 |
|
Wilds Pathfinder
Join Date: Aug 2008
Location: USA
Guild: Marked Souls [MkS]
Profession: E/N
|
Very nice. This is one of the better walkthroughs with excellent screenshots. Kudos to you.
|
|
|
|
|
Mar 02, 2009, 10:58 PM // 22:58
|
#7 |
|
Jungle Guide
Join Date: Jul 2005
Guild: [PIG]
Profession: W/A
|
nice job, definitely something you need an afternoon for
|
|
|
|
|
Mar 03, 2009, 12:20 AM // 00:20
|
#8 |
|
Frost Gate Guardian
Join Date: May 2006
Profession: N/Mo
|
GO GO Banana Peel!!
|
|
|
|
|
Mar 03, 2009, 12:23 AM // 00:23
|
#9 |
|
Lion's Arch Merchant
Join Date: Apr 2006
Profession: W/A
|
nice. I know that 600/smite can get through shadow, skeletons, and beach, but i'm not sure about forest.
|
|
|
|
|
Mar 03, 2009, 03:42 AM // 03:42
|
#10 |
|
Krytan Explorer
Join Date: Dec 2005
Location: CA
Guild: Scythes of Chaos [SoC], [PNOY] alliance guild forums: http://socguild.cjb.net
Profession: E/
|
you said you get faster at the run as you do it more and depending on what you want to kill and let live.
but how long does it usually take you to clean out the shadow, skeleton, beach, and forest? and since you have 3 heroes with you, how many obby shards do you usually get? really nice guide, great images, good work pariah =] I think i've seen you in game somewhere, i recognize your name Xp |
|
|
|
|
Mar 03, 2009, 05:38 AM // 05:38
|
#11 |
|
Frost Gate Guardian
Join Date: May 2006
Profession: N/Mo
|
Trinity:Good question. Ill answer it two ways.
When you do the run a number of times and know exactly what you can handle on your own you can absolutely flag your heros out of radar which may help your chances of getting items specifically for you like shards..I have gotten shards as well as gold weapons etc..so it's not uncommon..basically like a 4 man team but you can flag you team away from battles w heros.Shard drops are pretty random though I find..you can get 5 in a run or none..same as ecto. On the other hand..I don't do this for cash or shards.I do it to win.Artificial AI is just that for a reason..Im smarter.Seriously I do it for fun and to show people they can do it to..it never ever has been about wealth.With the Hero UW Guide and the Hero FoW guide..I think I might have 3k left to my name..and thats pushing it.Hope that puts things a little clearer for you. As far as how long it takes..I can honestly rip through it pretty fast.never timed myself though.I'd say everything I've covered here in an hour tops..that includes the Rastigan Quest. Dark:Ive always found taking the DNKP Quest out of Lions Arch in Hard Mode is really nice to make some cash.Titans are very generous sometimes. I'm still compilling areas guys like the Forgemaster and Hydra area so we will see what happens. |
|
|
|
|
Mar 03, 2009, 05:54 AM // 05:54
|
#12 |
|
Banned
Join Date: Feb 2009
Guild: YaRR Bear Pirates
Profession: P/W
|
Nice guide Hellfire, can it be done in HM?
 Also, what is the reward when u cleared FOW? |
|
|
|
|
Mar 03, 2009, 06:04 AM // 06:04
|
#13 |
|
Frost Gate Guardian
Join Date: May 2006
Profession: N/Mo
|
Anwyn..well..to be totally honest I have not tried to do this in hard mode..I have thought about trying it..but Abyssals and Mesmers make me think twice..constant knockdown from Abyssals and stupid fast Shatter from Mesmers would make me cry..but I'm always game to try so I probably will and Ill post here with an answer.
The end reward for the Fissure of Woe is http://wiki.guildwars.com/wiki/Chest_of_Woe |
|
|
|
|
Mar 03, 2009, 06:24 PM // 18:24
|
#14 |
|
Lion's Arch Merchant
Join Date: Jul 2007
Location: In Spain, of course
Guild: Gamer Español[GE]
Profession: N/Mo
|
Great Job.
I also think about Human vs AI to win :P (Fow pretty "easy" to understand) As always.... monks look like the worst counter to you. Dont know how but i think that some spiker like a hero version of PS assa will be enough to kill the monks (if they are alone) on NM but..... they wouldnt use the builds correctly. Best problem i Think you will face is healing area from Hydras monks.... maybe ^^. |
|
|
|
|
Mar 03, 2009, 06:38 PM // 18:38
|
#15 |
|
Wilds Pathfinder
Join Date: Jul 2006
Location: hell
Guild: Do U Trust Anet
Profession: N/Mo
|
I just go killroy all the way...no fansy stuff |
|
|
|
|
Mar 04, 2009, 04:26 AM // 04:26
|
#16 |
|
Frost Gate Guardian
Join Date: May 2006
Profession: N/Mo
|
ragnagard:Monks are really tough to solo..WoH makes it a never ending battle 1vs1 so I really decided that I had to destroy them all.As for assa I am totally useless at using that class and would most likely incorporate my mouse into my monitor very quickly out of frustration.
Devilman:Kudos for you!!Looks like you took the Fissure of Woe and pimped it out.I think your Kilroy needs to lay off the cheeseburgers..he's packing on a few. |
|
|
|
|
Mar 04, 2009, 09:20 AM // 09:20
|
#17 |
|
Lion's Arch Merchant
Join Date: Jul 2007
Location: In Spain, of course
Guild: Gamer Español[GE]
Profession: N/Mo
|
I know, I know.
<< Kinda "fow farmer" Looking at Wiki, says that they use: * Healing Ring --> Wont use if they are alone (i bet) * Healing Breeze --> Well... not enough for spikes and so * Renew Life --> Not dead * Word of Healing --> Problem * Zealot's Fire --> Not so great damage if you'r caster Maybe you can go through the mesmer way and use something like: http://pvx.wikia.com/wiki/Build:Me/E...y_Surge_Mesmer Combine this with signet of humility and you got a Monk without WoH and only with healing breeze as a "good skill" for about 12 secs. Take another Mesmer with same build, different optional skill and the target monk will have (-9 * 4) enegy spike and elite shutdown. IF you wanna choose the evil path ( Put SS on him and go go go spike da monk! And you can even remove ress signet.... Of course i cannot think about killing the 4 monks group... hardest one to clear for me ^^ Last edited by ragnagard; Mar 04, 2009 at 09:31 AM // 09:31.. |
|
|
|
|
Mar 06, 2009, 06:12 AM // 06:12
|
#18 |
|
Frost Gate Guardian
Join Date: Jun 2007
Location: NY
Guild: RaiN
Profession: Rt/
|
now i need a guide so i could get a brain that could multi task properly
>.> |
|
|
|
|
Mar 06, 2009, 07:42 AM // 07:42
|
#19 |
|
Frost Gate Guardian
Join Date: May 2006
Profession: N/Mo
|
can't help with the brain guide but this might help some people along that line in regards to heros and you.
http://www.guildwarsguru.com/forum/s...php?t=10293264 Last edited by Pariah Hellfire; Mar 06, 2009 at 07:47 AM // 07:47.. |
|
|
|
|
Mar 06, 2009, 11:34 PM // 23:34
|
#20 |
|
Ascalonian Squire
Join Date: Nov 2007
Location: Somewhere near the sea
Profession: N/
|
Great guide
. I need try this, i love beat AI. |
|
|
|
 |
|

«
Previous Thread
|
Next Thread
»
| Thread Tools | |
| Display Modes | |


 Linear Mode

|
|

 Similar Threads
|
||||
| Thread | Thread Starter | Forum | Replies | Last Post |
| Soloing UW in HM as A/Me (Image Heavy) | teotuf | Farming | 256 | Jun 02, 2009 02:03 AM // 02:03 |
| Skinny Corpse | Farming | 383 | Dec 09, 2008 03:11 AM // 03:11 | |
| Our 8 man [Profession] FoW Runs! (Image Heavy) | Akolo | The Campfire | 141 | Nov 23, 2008 01:03 AM // 01:03 |
| More UW 55 Necro IMAGE HEAVY | Pariah Hellfire | Farming | 33 | Jun 23, 2008 08:34 PM // 20:34 |
| The Drunk Monk! (Image Heavy) | Veripare | Screenshot Exposition | 17 | May 09, 2006 01:29 PM // 13:29 |
All times are GMT. The time now is 11:40 PM // 23:40.
