Guild Wars Forums - GW Guru


Go Back   Guild Wars Forums - GW Guru > The Hall of Knowledge > The Campfire > Farming

Notices

Reply
 
Thread Tools Display Modes
Old Aug 30, 2010, 03:16 PM // 15:16   #1
Unbridled Enthusiasm!
 
Essence Snow's Avatar
 
Join Date: Nov 2009
Location: EST
Guild: DPR
Advertisement

Disable Ads
Default Current Dungeon Guides

Note* let me know if you have any input...I'll be glad to add and give credit.

1) Catacombs of Kathandrax
a) Monk 600~OwAT4mHDZ6uSLqeIigmUuEgQfAA or Owoj8sQ7KS3VaR1DREqXylAE6DA
*requires a smiter~OwQT44HDnAfhUe6zg5LlyE

b) Sin~ *solo*OwZjkwf84QHQ6MfV0kNQ5i8Q7iA (vid)Solo Kath Vid
*duo* OwZjkwf84QHQ6MfVri7i0kuM4OA, OwRjcwf84QHQ6MlBri7i3lNQ4OA
Level 1 Pop a con and run to the Wurm. When you get near the Wurm, use Death's Charge and both shadowstep to the Wurm. Switch to your zealous daggers, cast GDW on each other, have Support use Barbs and spam Ebon Vanguard Assassin Support while auto-attacking till Wurm is dead. Grab the key and either use Death's Charge or run around to get back up. Use IAU to get rid of cripple. Maintain Shroud of distress. Head to the second level.

Level 2 Use another con and run to the Regent of Flame.
Switch to your zealous daggers, cast GDW on each other, have Support use Barbs and Ebon Vanguard Assassin Support while auto-attacking till Regent is dead. Grab key and run to lock. After the door, there's a wurm that will knock you down. USE IAU!. And maintain Shroud of Distress. Run to level 3.

Level 3 Pull a Becalmed Djinn and have your team kill it.
Have the Tank pull everything to the right side of the room. Stay alive by keeping up. SF - Shroud - Stoneflesh - Shadow Refuge. (Use Scythe to manage energy and fuel Shadow Refuge) Run on the wall of the left side of the room, ping your party to the corner area. Run through the mobs, and spawn the Flame Djinn. Run back to where your team was and have them kill.
Grab the key and head with your party to the next shrine. Everyone should wipe so the party resurrects at the next shrine. Ball up everything in the next room and pull them off to the side. Have the team run towards the Siege Wurms so they can die and shrine jump to the next shrine. In the next room, use the Flame Jets to kill the Burning Spirits. This will burn off DP and clear the path for the rest of your party to shrine jump to the next shrine, wipe and collect money from customers. When rezzed at the 2nd to last shrine, tell party to stay.

Boss Cast GDW on each other, have Support cast Barbs, and spam Ebon Vanguard Assassin Support. Drop Fire Bombs, away from partner.
Auto attack with either Spear or Daggers, preferrably the support with daggers and the tank with spear. (This will keep Ilsundur from blowing both of you up with Fire Bomb if someone messes up.) When dead, wipe and have party get chest.
c) SC~
A/P x5-6 ~Owlj8xjYpSHQ6M3lNQri7izZ4OA
A/N x1~OwRjcwf84QHQ6M3lNQlB7i0k4OA
A/E x1~OwZjkwf84QHQ6MfV0k3lNQce4OA
*A/Mo x0-1~OwNj4Mf8ITHQ6M3lNQ0k4O7iyDA(optional)
(vid)KathSC vid
Level 1: drop 1.5k for BU pop. Run to the Wurm (A/E goes seperately to gate) Kill it with the rest of the party using EVAS, and Spear attacks Use Death's Charge on the Wurm or EE on one of the EVAS to collect the key Use GDW on other A/P's to increase DPS and chance of KD's Run to level 2 or wait for the tank

Level 2 Pop BU and run to the Regent of Flame following left path. Kill it with EVAS, GDW, and normal attacks (Don't forget to get the key) Run to Level 3 or wait for the tank to zone. Right past the gate lock there will be Wurm pop-up that will KD you down for 5 seconds that can become a problem for people new to Spearway. If IAU is recharging, hug the either side and continue running (Once your past the Res shrine then the wurm won't pop up and KD you)

Level 3 Cast Shroud and start casting GDW on everyone. Pop the BU once everyone has loaded. Wait for the Tank to pull the Becalmed Djinn Spike the Djinn as normal just without EVAS due to VoS. This is where GDW shines. Wait for the tank to pull aside the mobs. The Barbs sin should now start pulling the Flame Djinn As soon as the Flame Djinn comes towards the party cast EVAS and GDW on your party. The longer the Flame Djinn is on it's ass the better the chance it won't kill anyone and it running away. Collect the key Run to the final room Before spiking Ilsundur, Lord of Fire start using GDW on the rest of the A/P's (and the A/N, A/Mo, and the tank if you're confident in your energy. As long as they GDW they will do as much damage as the A/P's) Start spaming EVAS and attacking Ilsundur If you get a fire bomb run away from the group and drop it (It doesn't matter if the EVAS die) Continue maintaining GDW on the party If the Barbs Sin starts dying use Ebon Escape (if you brought it) to heal him/her Collect Chest reward
d) Manly~Link

2) Rragar's Menagerie
a) Monk 600~OwUT4mHDZ6uSLqeIiYJYXUfAgAA
*requires smiter~OwQT44HDnAfhUe6zg5LlyE

b) Mes 600~OQNEAooj8MdXpFVP42YDGBAXqPA
*requires smiter~OwQT44HDnAfhUe6zg5LlyE
*requires SB~OwAT043AZKi4B03xuJCUeQfAgAA

c) Necro 600~OANDQrZPT3VaR1D+BkiylcB6DA
*requires smiter~OwQT44HDnAfhUe6zg5LlyE
*requires SB~OwAT043AZKi4B03xuJCUeQfAgAA

d) Derv 600~OgOl8wpiasisKdXpFVP8eRK2DyepPA
*requires smiter~OwQT44HDnAfhUe6zg5LlyE
*requires SB~OwAT043AZKi4B03xuJCUeQfAgAA

e) Rit 600~OAOj8whM5Q3VaR1DWMEPkiwl6DA
*requires smiter~OwQT44HDnAfhUe6zg5LlyE
*requires SB~OwAT043AZKi4B03xuJCUeQfAgAA

f) Ele 600~OgNEgUuc9MdXpFVPoNI9RKuWqPA
*requires smiter~OwQT44HDnAfhUe6zg5LlyE

g) SC
~A/P x0-1~ Owlj8xjjJT6MHQ4OUY7Y5i4iRQA(optional)
~A/Me x6-7~ OwVjIwf84Q6MHQ0lNQAANB7iRQA
~A/N x1~ OwRjcwf84Q6MHQ0lNQWClBrixkA
Level 1 Pop Bu Main Tank grabs a Keg from the powder keg station, team runs to the first destructible door and destroys it using the keg main tank pick up. Once door is broken run through to the next powder keg station and "keg farms" the Shadow Blades(this is recommended to help take aggro off and it actually speed up the run) Main tank puts up Enchants and runs into the Wardens mob, Stay as close to every unit as possible, Cast both wards then Pick a target nearest the center of the group. Once the wardens group is down run through the now open gate to Rragar The main tank will aggro first and pull the shadow blades to the right next to the cliff The rest of the team will then Spike Rragar and retrieve the key Run through the rest of the map to the gate.

Level 2 Pop Essence Run to Rragar, It is recommended that you stop at the bridge just before Rragar and send someone in to pull away the Shadow blades from the path, as they are fast and hard to break aggro. Once past that the tank will again run into Rragars mob and Stand Next to him, Use both Honor and Ward then Spike Rragar with main group. The person who pulled the Shadow blades should be most of the way to the gate so the main team shouldn't have to run all the way their.

Level 3 Follow the Left path the breakable wall, Have your main tank run up and spawn the shadow blades that break down the wall, then pull them over to the keg station and kill them. Main team runs past the reaming enemies into the hall where Fleshreaver is, Have them stand behind a wall so they won't get hit by the powerful paragons, Main tank will run into the chamber and pull the Fleshreaver's mob back towards main team, (You will need to kill the Fleshreaver Hound first, don't let him anywhere near main team, He does massive amounts of holy AoE Damage and when he dies the Fleshreaver will blow him up for 100-300 damage!) Spike using only Chaos storm and E.V.a.S, Make sure you stay away from bodies until the mobs are dead. When dead retrieve the key form the back room where Fleshreaver was and make your way to Rragar. At Rragar Main tank runs in puts down both ward then team spikes Rragar (do not stand close to him as if he gets of an Energy surge it hits for about 200) After hes gone Body Block the Hide Splinter and spike him
h) Sin Solo~OwZjkwf84QHQ6MlC3lNQ5i8Q6iA
Thanks Stone W for Vid!
i) Manly~Link

3) Cathedral of Flames
a) Monk 600~600~OwAS8YITRE1DaR3VkiAA6DAEA
* requires smiter~ OwQT44HDnAfhUe6zg5LlyE

b) Mes 600~OQNEAooj8MdXpFVP42YDGBAXqPA
* requires smiter~ OwQT44HDnAfhUe6zg5LlyE
*requires SB~OwgS0YITREGb+O2NRgyD6DAE

c) Necro 600~OANDQrZPT3VaR1D+BkiylcB6DA
* requires smiter~ OwQT44HDnAfhUe6zg5LlyE
*requires SB~OwgS0YITREGb+O2NRgyD6DAE

d) Derv 600~OgOl8wpiasisKdXpFVP8eRK2DyepPA
* requires smiter~ OwQT44HDnAfhUe6zg5LlyE
*requires SB~OwgS0YITREGb+O2NRgyD6DAE

e) Rit 600~OAOj8whM5Q3VaR1DWMEPkiwl6DA
* requires smiter~ OwQT44HDnAfhUe6zg5LlyE
*requires SB~OwgS0YITREGb+O2NRgyD6DAE

f) Ele 600~OgNEgUuc9MdXpFVPoNI9RKuWqPA
* requires smiter~ OwQT44HDnAfhUe6zg5LlyE

g) Sin Solo~OwVjIwf84QHQ6M3lNQaANBde2gA
Thanks Stone W for Vid![


4) Ooze Pit
a) Monk/Mes 600~OwQTQGHD5oTpMi4LfAUeyE
* requires smiter~ OwQT44HDnAfhUe6zg5LlyE

b) Monk/Nec 600~OwQTcs3CZ6uSLqeIiQuMQAgQfAA
* requires smiter~ OwQT44HDnAfhUe6zg5LlyE

c) Degen~600 ~ OwYTomHDZ6uSLqeIi4mBuUfAgAA
Smiter~ OwUT44HDnJlIT68yD8R+QfYQAA

d) SC
A/N caller x1~ OwRSc4PTHQ6MpZ0l7i3lNQlBA
A/N spiker x7~ OwRSQ4PTHQ6M4O0l7i3lNQuBA
(vid)OozeSC vid
One spiker runs to the switch, rest of the group heads toward Gloop. After the door is open, one spiker will pull Gloop up stairs and party will spike him down with EVAS. (you might want to kill the group by the last res shrine) Wipe at the res shrine near the boss room if any party members died. Go around to last stair case on right and have 1 player pull Prismatic oozes down to base of stairs then ee over and spam Unholy Feast until the Prismatic Oozes die (Do NOT use ebon sin or wand/spear on Prismatics). Once the chest spawns do not rush it, that'll only make it a nightmare for others. Either wipe below stairs or run around the platform. Kill ooze spawns if necessary and collect chest.

e) Sin solo~OwRjcwf84QHQ6M3lNQ7BsBul4OA
Thanks Stone W for Vid![


5) Darkrime Delves
a) Sin Solo~ OwZjkwf84QHQ6MfV3lNQli1iuMA

Thanks Stone W for Vid![

b) Derv Solo~ Ogej8trGLTHQtX0kEYli1iRQuMA
Level 1: Use redrock and off to the races. Run as normal and use kegs to open walls and kill Jotun boss. (Keep conviction up while running) While boss is on you, you can alternate stances. (blind is very useful when u need to recast spells and IAU is not recharged. Continue running to key area, (remember to save IAU for vatteirs) grab key and continue to lvl 2

Level 2:Use redrock and take off running. Run to boss location and aggro boss. (helps to refresh all enchants right b4 aggroing) Once aggroed, run back past the rez shrine. This will lose aggro and boss will now be aggroable (word?) with a long/flat bow. During your time fighting the boss it is important to alternate stances wisely and keep shroud active. Since boss is war VoS up-keep is not needed. (if you want to speed this fight up u can also use a summon stone, I forgot during my timed run) Kill boss by spamming earbite+sig of infection...pick up key and run to lvl 3.

Level 3:I don't think redrock is needed here tbh. Anyhow run to rez shrine outside of boss chamber. After activating it, pull all aggro away from shrine and wipe if needed to lose aggro. Boss chamber: Run in precast and aggro all jotuns in front and to the left of boss w/o aggroing the boss + wipe. Pull them far enough that you'll be able to aggro boss alone with bow once you have rez. Pull boss w/bow and again alternate stances wisely. (the lil trap/hut thing in the front is where I fought boss) Kill boss (again u can use summon to speed this up)and voila...Dervish Darkrime HM solo!


6) Frostmaw's Burrows
a) Sin Solo~ OwZTkY/8Z6ASnhmsB6rKXkHCBCA (this requires a lot of cons & is not for inexperienced permas)

Thanks Stone W for Vid![

b) Ranger Solo~ OgcSc5PT6MHQrgsi0kNQ4OCH
Check out this post here by Backwoods!


Level 1 Stay right and run to gate (I cannot recommend tacs here but I think you know what I mean) You can also try to sliver down wurms, but you'll probably want to grab aggro from the drakes.

Level 2 Go left and sliver/whirl wurms (you'll need stone flesh up while slivering) or you can use unmentionable tactics. Stay on left path run to where the path splits. Go to one side and kill wurms and pop bat spawn...then go to other side to avoid bats. Go to the end and sliver wurm. Zone

Level 3 Fun part....Pop all your cons...you'll need them...(Note* you'll need to be wary of QZ) Prepare to pop the Frostmaw Spawn...sliver the djinns then pop the wurm. Sliver wurm and continue or run to first snowball (avoid incubus). Use the snowball to kill the frostmaw spawn by standing next to ball..... Watch out for incubus patrols. (it is suggested that u know them all b4 even attempting this) Using IAU while under QZ makes it basically maitainable. Use cover enchants b4 chance of aggroing bats....for the 2 mass spawns you'll need to be preped b4 charging past them (you basically get 1 chance b4 they are set and rdy). HoS and or cover enchants are your friends! (if you are having problems getting past the mass spawns consider popping a summon to distract them) For the 1st mass spawn...precast and charge towards res shrine. Then sliver wurm or kill frostmaw spawn same way as you killed first frostmaw spawn and continue. B4 the 2nd mass spawn you are able to creep along the left wall and pop the Frostmaw spawn w/o popping the bats. Sliver down spawn...precast and charge past bats towards end of the lvl. Alternatively you may Run, left turn, left turn and run to the corner to lose aggro. Cast SF and all enchs + IAU + Dark escape again and death's charge to icy staglamite, run off to break aggro from incubus and cast all enchs again. Snowball frostmaw spawn after with the ball near icy stalagmites. Watch the patrol of bats and pop spawn...sliver down (might want to sliver djins 1st again) or you may use snowball to kill spawn and zone.

Level 4 Run, run, run to end of lvl. (be mindfull of QZ, wurm pops, and bat patrols) Use same tacs as lvl 1.

Level 5 Avoid snowballs and run to bosses chamber. Kill the 3 litters of wurm. (kill the one by the entrance last) Pull Frostmaw back out the entrance of the chamber to the snowball.
b) SC *note~snowway also works w/a ward tank
~A/E x1(tank)~ OwZSk4PT6MHQ3lNQ0krgqO4OA
~A/E x6(dmg)~ OwZSo4PT6MHQNQ0k0l5MRQpZA
~A/N x1~ OwRSc4PT6MHQNQ0k0llBWCpZA
(vid)FrostSC vid
Level 1 Everyone runs to the door and kills Wurm spawn. Head to the next level.

Level 2 Kill Wurm spawn at left door. Take a right and head through the gate on the right side, the Incubi will have spawned at the other gate. The main tank can pull the Jotun away. Head to the end door and kill the Wurm and Elementals. Head through the door.

LeveL 3 Kill the Wurms that will spawn. Main Tank pulls the Frostmaw Spawn to the group. Run past the Incubi patrol to the next room. The hallway ahead will have a Wurm spawn and a large spawn of Incubi to get past. Kill all the enemies in the hallway unless you are confident your group can make it past the large spawn of Incubi. If your group manages to make it past, head down the left where you will meet a Wurm spawn, the main tank can pull this spawn into the snowball as seen in the video. Go through the now open wall and head left. There is an Incubi patrol and Wurm spawn here. The group can run to the far side as a safe spot. The main tank then pulls the Frostmaw spawn to the group. Run to the next area, past another large Incubi spawn. Run to the end, avoid the Incubi patrol, and pull the Frostmaw group into the snowball to open the next area. Head to the next level.

LeveL 4 Avoid the incubi patrols and head to the end. Kill the Frostmaw Spawn and head through the door.

LeveL 5 Kill all the of Wurms to spawn Frostmaw the Kinslayer. You can head to the far edge to avoid aggro from the three siege wurms. Have team spam skills until the boss dies An alternate method is to just pull Frostmaw into a snowball. Everyone can now collect the chest.


7) Sepulchre of Dragrimmar
a) Sin Solo~ OwZSk4PTSf6M5i8QHQ3lNQ4OA

b) Ranger Solo~ OgcTcTc+ZiHRn5AKNbF8u8XT4AA
Check out this post here by Backwoods!


Level 1 This is run the exact same as it was b4. Run to proofs and activate. Run to lvl 2

Level 2 Run to boss chamber (you may want to dispatch of the avalanches) Grab bosses and elemental aggro and sliver/whirl boss 1st then his posse.

Also check out this post by CE Devilman here Thanks CE!

(older vid)SoD solo vid
b) Monk 600~OwUS8YIT3VaR1DRELByl6DAEA
* requires smiter~ OwQT44HDnAfhUe6zg5LlyE

8) Raven's Point
a) Monk 600~ OwAT4mHDZ6uSLqeIigmUuEgQfAA
* requires smiter~ OwQT44HDnAfhUe6zg5LlyE
*Ranger Hero~ OgMU0E7eNMLI32Bd2tKJP0k+AA

b) SC
A/N x1~ OwRjcwf84Q6MHQ0lNQlB2BziAAA
A/P x1~runner~ Owlj8xjjJT6MHQ0kNQ1Y7Yzi4YA
A/P x6~ Owlj8xjYpS6MHQzZNQRQzi7ijiA
Concoctions You can stock up on these if you have a character that has not accepted the quest reward. 100 aoe dmg per min to destroyers while not under SF. This can add up fast with 8 players! Suggested 10 per run per person.

Run to Raven's Point. (Make sure you get quest in the opening)

Level 1 Collect Essence of Celerity (BU) money, and make your way into the room on the right. (Spike any Incubus's you run into with Barbs + EVAS. Make your way to the first Ancient Vaettir kill it, and light the flames. Run to north to next Ancient Vaettir, kill it and it's surrounding buddies. Light the torches. Run into room, Blow up Reaper of Destruction with Barbs, weaken,EVAS + Naga. Run to next level.

Level 2 Pop BU, Run to Ancient Vatteir and spike, light the torches. A gatesin will remain by gate to zone. Run to Reaper of Destruction. Blow up Reaper of Destruction with Barbs, weaken,EVAS + Naga. (If you kill only the Reaper, pick up the key and run to a safe spot.) Right when boss dies, Support should start running to next floor.

Level 3 Run to Boss. Kill the waves of foes, using the same pattern you used in the other floors. Kill foes till Plague spawns (mesmers 1st) Kill the Plague of Destruction with Barbs, weaken,EVAS + Naga. (It will die shortly.)


9) Vloxen Excavations
a) Monk 600~ OwUUEuB9YoO3VtY9IiEBEB6DAC or Owkj8sQspR3VaR1DRErl0bAE6DA
* requires smiter~ OwQT44HDnAfhUe6zg5LlyE
a1)Famine~ OgkkYZXGGbqDyZ7U+uOQH6tP+GD
a2)Quicksand~ OgMTYxri5J4udgOInrj8QfQTAA

b) Sin solo~OwRTcY/8Z6ASnpBizLMYPQXkmEA
Thanks Stone W for Vid![


10) Bogroot Growths
a) SC~
A/D x0-1~tank~ Owpj0Nf8KT6MHQ0ksXEYrXRQxlA
A/Mo x0-1~bond~ OwNT0mH/Z6ASnhukmMeQeQnoBC
A/N x1~caller~ OwRjcwf84QHQ6M0l0klBWCfCNQA
A/P x5-7~spikers~ Owlj8xjYpSHQ6M0kNQagri7izZA
Run to dungeon. Grab quest from Griff (only one person needs as quest is automatic after that).

Level 1, either have everyone run for lvl 2 with or w/o bu. If not using bu, it is much easier if you use candy or cupcake.

Level 2, pop bu and run. Since the SF buff...getting past the Stormclouds is much easier. Continue running to Patriarch's chamber (try not to clump together while running). After the res shrine run to left side and lose aggro. Have A/N call barbs on Patriarch and spike with ebon sin. Collect key and continue to boss chamber. Bond the A/D and have them ball agro. Use MoP and barbs to help kill and collect chest
b) Manly~Link

11) Bloodstone Caves
a) Monk 600~ OwAT4mHDZ6uSLqeIigmUuEgQfAA
b1) Well Smiter~ OwQUUQH/UoEMMldBf5jehsTA
b2)Death Nova~ OwQUUQH/UoEMMloBf5jehsTA
*Ranger Hero~ OgMV4iHa5LivB5E8gOVnNdFReoPA

b) Sin Solo~ Owpj8xjzKTHQ6M3lNQrXcepZRQA
Thanks Stone W for Vid![


12) Shards of Orr
a) Monk 600~ OwIT8U4iVKioe4uSLim84QuEgA
*QZ Ranger~ OgMTY57gZB52uoD6sb9hmkJA
*Smiter~ OwAS4YITpEpiGE5D4DyD6DAEA
*BiP option~ OwQTQwm+Y6OgeIk43RkgU81RfA

b) Ele 600~ OgNEgUuc9MdXpFVPoNI9p6IXqPA
* requires smiter~ OwQT44HDnAfhUe6zg5LlyE

c) SC
~A/P x1~ Owlj8xjjJTHQ6MxlAArg0k0b7YA
~A/N x1~ OwRkQUH7HPS0BkOTDUZAUFAANJdJ
~A/D x6~*snow* Owpk0lf84sm0BkOD/lAU3jrINJdJ*Ebsoh* Owpk0lf84sm0BkOD/lAU3DAANJdJ
(vids)SoOsc a/d vid,SoOsc a/p vid


Level 1 Upon entering Shards of Orr, run to the Beacon of Droknar and take the blessing. Drop 1500 gold for the consumables (3x Essence of Celerity). Once the Essence has been used cast Shadow Form and follow the A/P, being sure to use "I Am Unstoppable!" whenever "Can't Touch This!" is low or down. Use Ebon Escape to stay close to the A/P and heal teammates. Once you have reached the Cursed Brigand, the A/N will run to the gate. Wait for the A/P to call the Cursed Brigand as a target before jumping in. Once the Brigand has been killed the A/N will zone to Level 2.

Level 2 Take the Blessing from the Beacon while the A/P balls the group on the wall. Jump in and use your chain making sure to finish off any stragglers. Run to the wall and wait for the A/P to approach the hill. Cast Shadow Form and "I am Unstoppable!" as the A/P approaches and jump to them with Ebon Escape. Run to the wall and wait while the A/P balls the foes. Once the A/P has called a target, jump in and use your chain. Follow the A/P through a small group of foes to the next room and wait for them to separate the Brigand. Kill the brigand and wait for the Gatesin to zone.

Level 3 Whereas in the earlier levels it doesn't matter too much if you die, dying here will increase the time to kill Fendi. Stay with the A/P and the rest of the team as you make your way to the Brigand. Keep an eye on everyone's health, especially the A/P. Use Ebon Escape to heal. Once in the Brigands hall run to the far left corner and wait for the A/P to group the Brigand's mob. Jump in with "I Am Unstoppable!" and Ebon Escape and use your chain. Follow the A/P through the door and make your way to Fendi. Beware of traps. Once the A/P has Fendi on a wall and calls the target use Ebon Escape to jump in and use your chain. Maintain energy with your Daggers and Golden Lotus Strike. Make sure you have enough energy to recast Shadow Form. DO NOT DIE NEAR THE GROUP! If for some reason you cannot recast Shadow Form run away from the main group and try to recast it. If you do not have Shadow Form up, the group will die as Fendi will cast Chilblains. Rinse repeat, a good time is 10-15 minutes but with experienced teams it is possible to get under 10 minutes.


13) Oola's Lab
a) Sin Solo~ OwZSg4PTSf6M0kHQIQAANQ7iA

b) Derv Solo~ Ogej8xpDLTHQtX0k3lNQ7iRQ4OA

Thanks to <Blaze> for the Vids!
Lvl 1
Lvl 2
Lvl 3

c) Ranger Solo~OgcTcVs+XSn5AC3ZF8XbC6ukmEA
Check out post here. Thanks to Backwoods for R/A variant!
Lvl 1 Run and pop last spawn of Xien. Lose all aggro and pull with long/flat bow. Blind Xien and use ebon sin/summon stone to kill. Pick up key....zone.

Lvl 2 Run to Malfunctioning Golem area. Grab flux and take it to charger. (you can use a charged flux drop to kill the imps if you want to) Pull the Malfunctioning Golem to the charger and charge flux drop. (use unseen fury if needed)

Lvl 3 Run to back of boss chamber careful not to aggro either of the flame guardians. Blind TPS and use ebon sin/summon stone to kill. Collect chest!


14) Arachni's Haunt
a) Ranger Solo~OgcSc5PT6MHQCHNQpZrg3lrG
See posts w/SS here and here.
Level 1 Use essence+grail+candy corn/golden egg untill experienced enough. After that you can make it with cupcake or red rock candy. Use alcohol when you meet ettins to prevent kd. Burn throught spider webs with asura staff, keep Whirling defense on as much as you can to avoid poison and cripple, use antidote signet if poisoned. Venomweavers, sprouts, poison darts and might get you poisoned as well as fungai spores if they explode. Painweavers use signet of toxic shock which kills you if not fast enough with antidote signet.

Level 2 Get asura staff from left of start and carry it with you untill end. Pop Essence, Grail of might and use golden egg/candy corn to keep SF on. After last shrine kill all venom and bloodweavers you encounter with whirling defense. Use walls as advantage to wait for apply poison to end on venomweavers, they only use it once.Use Dark escape, shadow sanct and feigned when needed (when going below 1/4 health or SF/shroud is rupted)
Bloods use anthem of distruption, if you see or hear it beign used, wait for 5 seconds before casting anything like SF. Anthem affects all spiders and rupts even through walls. Burn eggs with asuran flame staff, last egg of both egg-group spawns a boss and bloods+venoms, kill bloods and venoms first.

Thanks to Backwoods for guide!


15) Slavers' Exile
All sub bosses are completed in normal mode. Duncan is completed in hard mode.
a)Thom/Rand/Selve/Forge~Ap/swap~Owlj8xjjJTHQ6M0l0k7Y0b1Z4YA~A/Me storm~OwVjIwf84QHQ6M0l0kNB3U2gCOA~A/E ash~OwZjowf84QHQ6M0l0kDD5MuiIDA(snow swapped out for honor/wisdom on 2 bars)
Depending on your group some prefer 1 Ap and 7 A/Me or 7 A/E. A mix works very well 5 A/E and 2 A/me.

Thommis~Run all the way to the back side of the wall to the little nook. Make sure To use IAU near Mondir and EE to keep up. Once the casters are pulled EE over and spike trying to body block as much as possible. Key targets are the foes with hard rezes..dominator,cleaver...etc. Keep using EE to heal yourself and others.

Rand~Run all the way behind Rand's group to the corner behind the rock. Once aggro is pulled EE over and spike. If using the storm varient or some mix of try to CoP choking gas, Rezes, and Rand's troll urgent.

Selve~Send 1 player off to get key (typically not honor/wisdom/ctt). Rest of group runs left path to gate. Once key is grabbed run all the way to next gate. AP swaps out spirit of disenchant if one spawns and rest of group starts spiking. Stay balled as much as possible. Once the crypt slashers spawn the Ap will need to start using Ctt. Stay balled and spike down restless. Kill solo spawn and Ap will ball Selves group and ping for spike.

Forge~You can either send 1-2 players to right for key or whole group can go. Run to right all the way to the chamber with the forge imps. Stay along the right wall in the room. Making sure not to aggro any of the dwarves aggro a forge imp and pull it back and kill. After a sec the Dark Watcher will spawn...pull and kill it in the same manner. Run back to gate and all the way to Forge's chamber. Stay to the right side. Have Ap swap out disenchant if needed and pull aggro into ball and call for spike. Collect chest and resign if 4/5...to prep for duncan.
b) Duncan~ tank~OwZjkwf84QHQ6MfV5i8Q1ZIQ4OA~ctt/fb~ Owlj8xjjJTHQ6M0lIQ7Y0b1ZceA
Run all the way to end using ctt/fb/and shadowsteps to out run aggro and pop Duncan. Have swap, swap out the spirits of disenchant and pull away any unwanted aggro. Stoneflesh/silver chain duncan till dead.


16) Fronis Irontoe's Lair
a) Run spamming block...hug right wall to get in boss chamber..kill only Frontis

17) Secret Lair of the Snowmen
a) Fire/Minions/Fire

18) Heart of the Shiverpeaks
a) Monk 600~ OwUS8YITaR3V1DLBREyl6DAE
* requires smiter~ OwQT44HDnAfhUe6zg5LlyE

b) Ele 600~ OgNEgUuc9MdXpFVPoNI9p6IXqPA
* requires smiter~ OwQT44HDnAfhUe6zg5LlyE

c) Sin solo~OwZjkwf84QHQ6M3lNQ5i8QIQ4OA

d)SC~
~A/N x1~OwRjcwf84QHQ6M3lNQWClBpi0lA
~A/P x7~Owlj8xjZZSHQ6M3lNQri7iIQzZA
Level 1
Wait for BU to pop. Run the path on the right and bearing left until you reach Budger Blackpowder. Take a Keg from him and blow up the cracked wall near him. Continue running until you reach the end, there will be a closed gate with a group of skelk in front of it. Kill the group and zone to level 2.

Level 2 Wait for BU to pop. Run to the left and blow up the cracked wall using a keg from Budger Blackpowder. Continue running until you reach another closed gate with a group of skelk in front of it. Kill them and zone to Level 3.

Level 3
Pop the BU when everyone is loaded. Run directly to the boss room and blow up the door using a keg from Budger Blackpowder. Kill any aggro that has followed you BEFORE you aggro Magmus. When the aggro is dead aggro Magmus. A few groups of Oozes will spawn, Kill these before killing Magmus or they will multiply making the dungeon difficult to complete. Once the Ooze are dead begin killing Magmus.

At Magmus
Maintain barbs on him, while doing so maintain your health and spear him.
Once he reached 1/4 health he will turn non-hostile and return to the center where he spawned, and burst into 10 magma blisters. Kill these. Collect chest.

(a lot of this was based on wikis PvX,Wiki)

~Hope this helps. Thanks!~Take care and Have fun~

Last edited by Essence Snow; Jul 06, 2011 at 04:16 PM // 16:16..
Essence Snow is offline   Reply With Quote
Old Aug 30, 2010, 05:17 PM // 17:17   #2
Furnace Stoker
 
Olle's Avatar
 
Join Date: Aug 2008
Location: Ign: Miniature Julia
Guild: Teh Academy[PhD]
Profession: W/
Default

Awesome!
ive been wanting a thread like this for ages, thank you Snow!
Olle is offline   Reply With Quote
Old Aug 30, 2010, 05:18 PM // 17:18   #3
Grotto Attendant
 
system.fan's Avatar
 
Join Date: Aug 2008
Guild: "アoo アugs アlan [ァアァ]" | Retired in "Teh Academy [PhD]"
Profession: Mo/A
Default

cool to see (nearly) all dungeon running builds in one thread....

but well... you should explain the solo builds too or this here won't help a lot=)
system.fan is offline   Reply With Quote
Old Aug 30, 2010, 06:31 PM // 18:31   #4
Lion's Arch Merchant
 
Join Date: Jul 2009
Location: Canada, UW
Guild: O.O
Profession: R/
Default

Great thread thanks a lot. Id rly like to see the arachnis R/A build.
Vlad is offline   Reply With Quote
Old Aug 30, 2010, 06:38 PM // 18:38   #5
Wilds Pathfinder
 
Grim Aragorn's Avatar
 
Join Date: Oct 2005
Profession: A/
Default

are there any special tactics for the duo kathandrax?
Grim Aragorn is offline   Reply With Quote
Old Aug 30, 2010, 08:07 PM // 20:07   #6
Elite Guru
 
Lukyboy's Avatar
 
Join Date: Nov 2007
Guild: The Mirror of Reason [SNOW]
Profession: D/A
Default

Thanks for taking the time to do this. Just needs some cosmetic changes :P

Good vids aswell (especially the kathsc vid )
Lukyboy is offline   Reply With Quote
Old Aug 31, 2010, 02:35 AM // 02:35   #7
Not far from Elite
 
chessyang's Avatar
 
Join Date: Apr 2006
Location: Florida
Profession: W/
Default

thanks snow! it was cool to run with you the other day. keep tweeking the guide!!
__________________
Let's use our Voices! The Chapter Selection Screen
GW Wiki or Guru
Thank You
chessyang is offline   Reply With Quote
Old Aug 31, 2010, 10:23 AM // 10:23   #8
Ascalonian Squire
 
Rugia's Avatar
 
Join Date: May 2009
Location: Bialystok, Poland
Guild: LAoD
Profession: A/
Default

All I wanna say is Good Job!
Rugia is offline   Reply With Quote
Old Aug 31, 2010, 01:15 PM // 13:15   #9
Jungle Guide
 
snodaard's Avatar
 
Join Date: Jun 2006
Location: Holland
Guild: [Uni]
Profession: Mo/
Default

all I can say is <3
snodaard is offline   Reply With Quote
Old Sep 01, 2010, 01:12 AM // 01:12   #10
Unbridled Enthusiasm!
 
Essence Snow's Avatar
 
Join Date: Nov 2009
Location: EST
Guild: DPR
Default


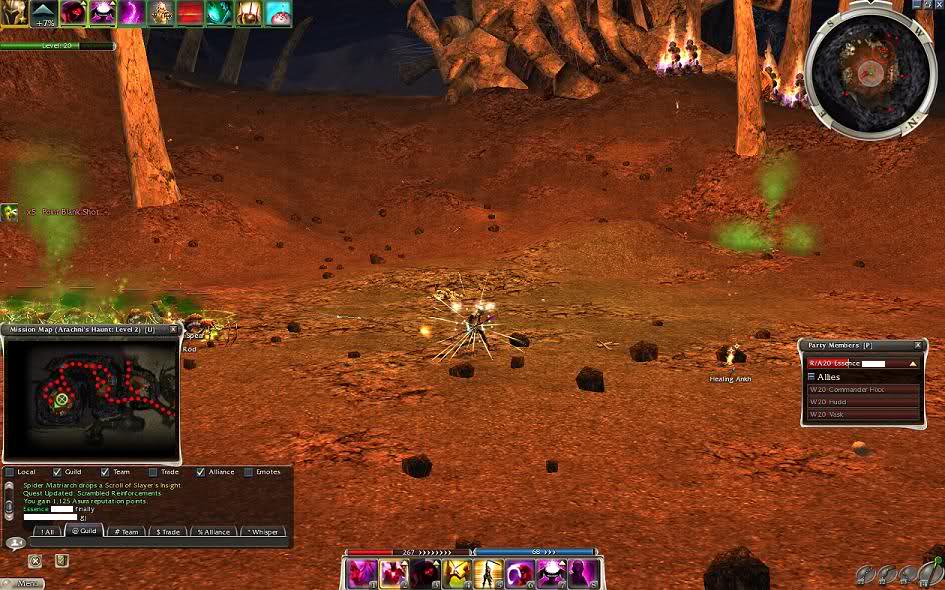
If anyone has some input/ideas I'd appriciate them. The build worked, but definately could be better

Did another test run...this worked fine...sry bout pic quality I messed it up resizing it. AoS wasn't really needed.


Last edited by Essence Snow; Sep 13, 2010 at 05:18 PM // 17:18..
Essence Snow is offline   Reply With Quote
Old Sep 01, 2010, 11:53 PM // 23:53   #11
Lion's Arch Merchant
 
dark4190's Avatar
 
Join Date: Sep 2006
Location: IGN: Serial Experiments
Guild: Farm people, not drops
Profession: Mo/
Default

Doomlore is back in business!
dark4190 is offline   Reply With Quote
Old Sep 02, 2010, 02:58 AM // 02:58   #12
Krytan Explorer
 
Join Date: Dec 2006
Location: Texas
Guild: [clap]
Profession: E/
Default

That's legit! Kinda makes me sad all the sins though. :/
Shrimz is offline   Reply With Quote
Old Sep 06, 2010, 08:15 PM // 20:15   #13
Academy Page
 
Join Date: Jan 2006
Location: Underworld
Guild: The Order of Kume
Profession: R/Mo
Default

I had a quick look at the CoF builds, and noticed the smiter build(OwAS8YITRE1DaR3VkiAA6DAEA) is a generic Mo/Any 600 tank with LoD, it's listed as smite for a couple of other dungeons too, i'm assuming thats a mispaste
Camel Sausage is offline   Reply With Quote
Old Sep 06, 2010, 10:24 PM // 22:24   #14
Unbridled Enthusiasm!
 
Essence Snow's Avatar
 
Join Date: Nov 2009
Location: EST
Guild: DPR
Default

Quote:
Originally Posted by Camel Sausage View Post
I had a quick look at the CoF builds, and noticed the smiter build(OwAS8YITRE1DaR3VkiAA6DAEA) is a generic Mo/Any 600 tank with LoD, it's listed as smite for a couple of other dungeons too, i'm assuming thats a mispaste
Fixed Thank you!
Essence Snow is offline   Reply With Quote
Old Sep 08, 2010, 02:38 AM // 02:38   #15
Academy Page
 
luwe80's Avatar
 
Join Date: Feb 2008
Location: BK, NY
Guild: We Made Mallyx Tap [Out]
Default

/clap

123456789101112
luwe80 is offline   Reply With Quote
Old Sep 08, 2010, 03:13 AM // 03:13   #16
Wilds Pathfinder
 
Join Date: Mar 2006
Profession: Mo/Me
Default

AWEEEEEEEESOME!
i <3 u snow~
afya is offline   Reply With Quote
Old Sep 08, 2010, 05:31 AM // 05:31   #17
Krytan Explorer
 
Join Date: Dec 2006
Location: Texas
Guild: [clap]
Profession: E/
Default

How does the ele for SoO work? I want to try this. But i've never done a SoOSC so i really dont know what to do. Is it just the ele and monk clearing out the entire dungeon? I can't find a video of it
Shrimz is offline   Reply With Quote
Old Sep 08, 2010, 03:10 PM // 15:10   #18
Krytan Explorer
 
Hells Fury's Avatar
 
Join Date: Aug 2009
Profession: W/D
Default

Quote:
Originally Posted by dark4190 View Post
Doomlore is back in business!
All of this is by far more slower or susceptible to fail than before nerf.

And whats the point of posting "guide" for duncan when you have 4 more areas before that.
"Run all the way to end using dash to out run aggro and pop Duncan"
Like it was that simple.
Hells Fury is offline   Reply With Quote
Old Sep 08, 2010, 03:44 PM // 15:44   #19
Unbridled Enthusiasm!
 
Essence Snow's Avatar
 
Join Date: Nov 2009
Location: EST
Guild: DPR
Default

Quote:
Originally Posted by Shrimz View Post
How does the ele for SoO work? I want to try this. But i've never done a SoOSC so i really dont know what to do. Is it just the ele and monk clearing out the entire dungeon? I can't find a video of it
The Ele 600 is not really a SC. It is a 600/smite clear. Since the holy wrath nerf....this has become much more difficult. You will basically need a human smiter or be very proficient at microing a hero. One good thing about SoO is that most of the foes are undead and therefore should die within 1 cast of holy wrath. To ele 600 you'll need to precast ward and obby flesh b4 aggroing....use GoS to maintain obby flesh and simply upkeep 600 chain. Take it slow while learning. I am sorry I do not have a video for it as I do not have vid capture on my comp. I'll try and find some ele 600 vids for you.

This is an older vid of an Ele 600 in cof....you'd need to replace Aura of Restoration w/ ward of stability....but the pinciple remains the same for the 600 tank. The smiter's tactics have however changed. (remember as a 600 you need to have a low al set 600)


Quote:
Originally Posted by Hell Darkblight View Post
All of this is by far more slower or susceptible to fail than before nerf.
Not necessarily.....the SCs have become much faster for the most part and some of the solos are on par with those prior to the updates.

Quote:
And whats the point of posting "guide" for duncan when you have 4 more areas before that.
"Run all the way to end using dash to out run aggro and pop Duncan"
Like it was that simple.
The reason I only have Duncan posted is b/c I don't have builds to run the sub-bosses anymore and they are not needed in HM to do Duncan in HM, so one can h/h them. If you have any input on the sub-bosses, I and many others would thank you. Running Duncan is actually not as hard as one might think. Once the duo reaches the end chamber (via simply using dash to outrun aggro), the summit foes can be avoided. The swap only needs to swap out the spirits of disenchantment then pull aggro and die. The restless (at range) and the other spirits are used to fuel sliver.

Last edited by Essence Snow; Sep 08, 2010 at 05:23 PM // 17:23.. Reason: added vid for ele
Essence Snow is offline   Reply With Quote
Old Sep 08, 2010, 09:45 PM // 21:45   #20
Ascalonian Squire
 
Join Date: Jun 2008
Guild: Til
Profession: R/
Default

14) Arachni's Haunt any news on the ranger build for this or how it works ????
and also heard Oola's Lab can be done with ranger too is it true if so any info on that tooo plz help give my ranger something to dooo
jeri blade is offline   Reply With Quote
Reply

Share This Forum!  


Thread Tools
Display Modes

Posting Rules
You may not post new threads
You may not post replies
You may not post attachments
You may not edit your posts

BB code is On
Smilies are On
[IMG] code is On
HTML code is Off

Forum Jump


All times are GMT. The time now is 06:38 PM // 18:38.


Powered by: vBulletin
Copyright ©2000 - 2016, Jelsoft Enterprises Ltd.
jQuery(document).ready(checkAds()); function checkAds(){if (document.getElementById('adsense')!=undefined){document.write("_gaq.push(['_trackEvent', 'Adblock', 'Unblocked', 'false',,true]);");}else{document.write("